1972 Shasta Compact Restoration
Jim and Beth Denenny
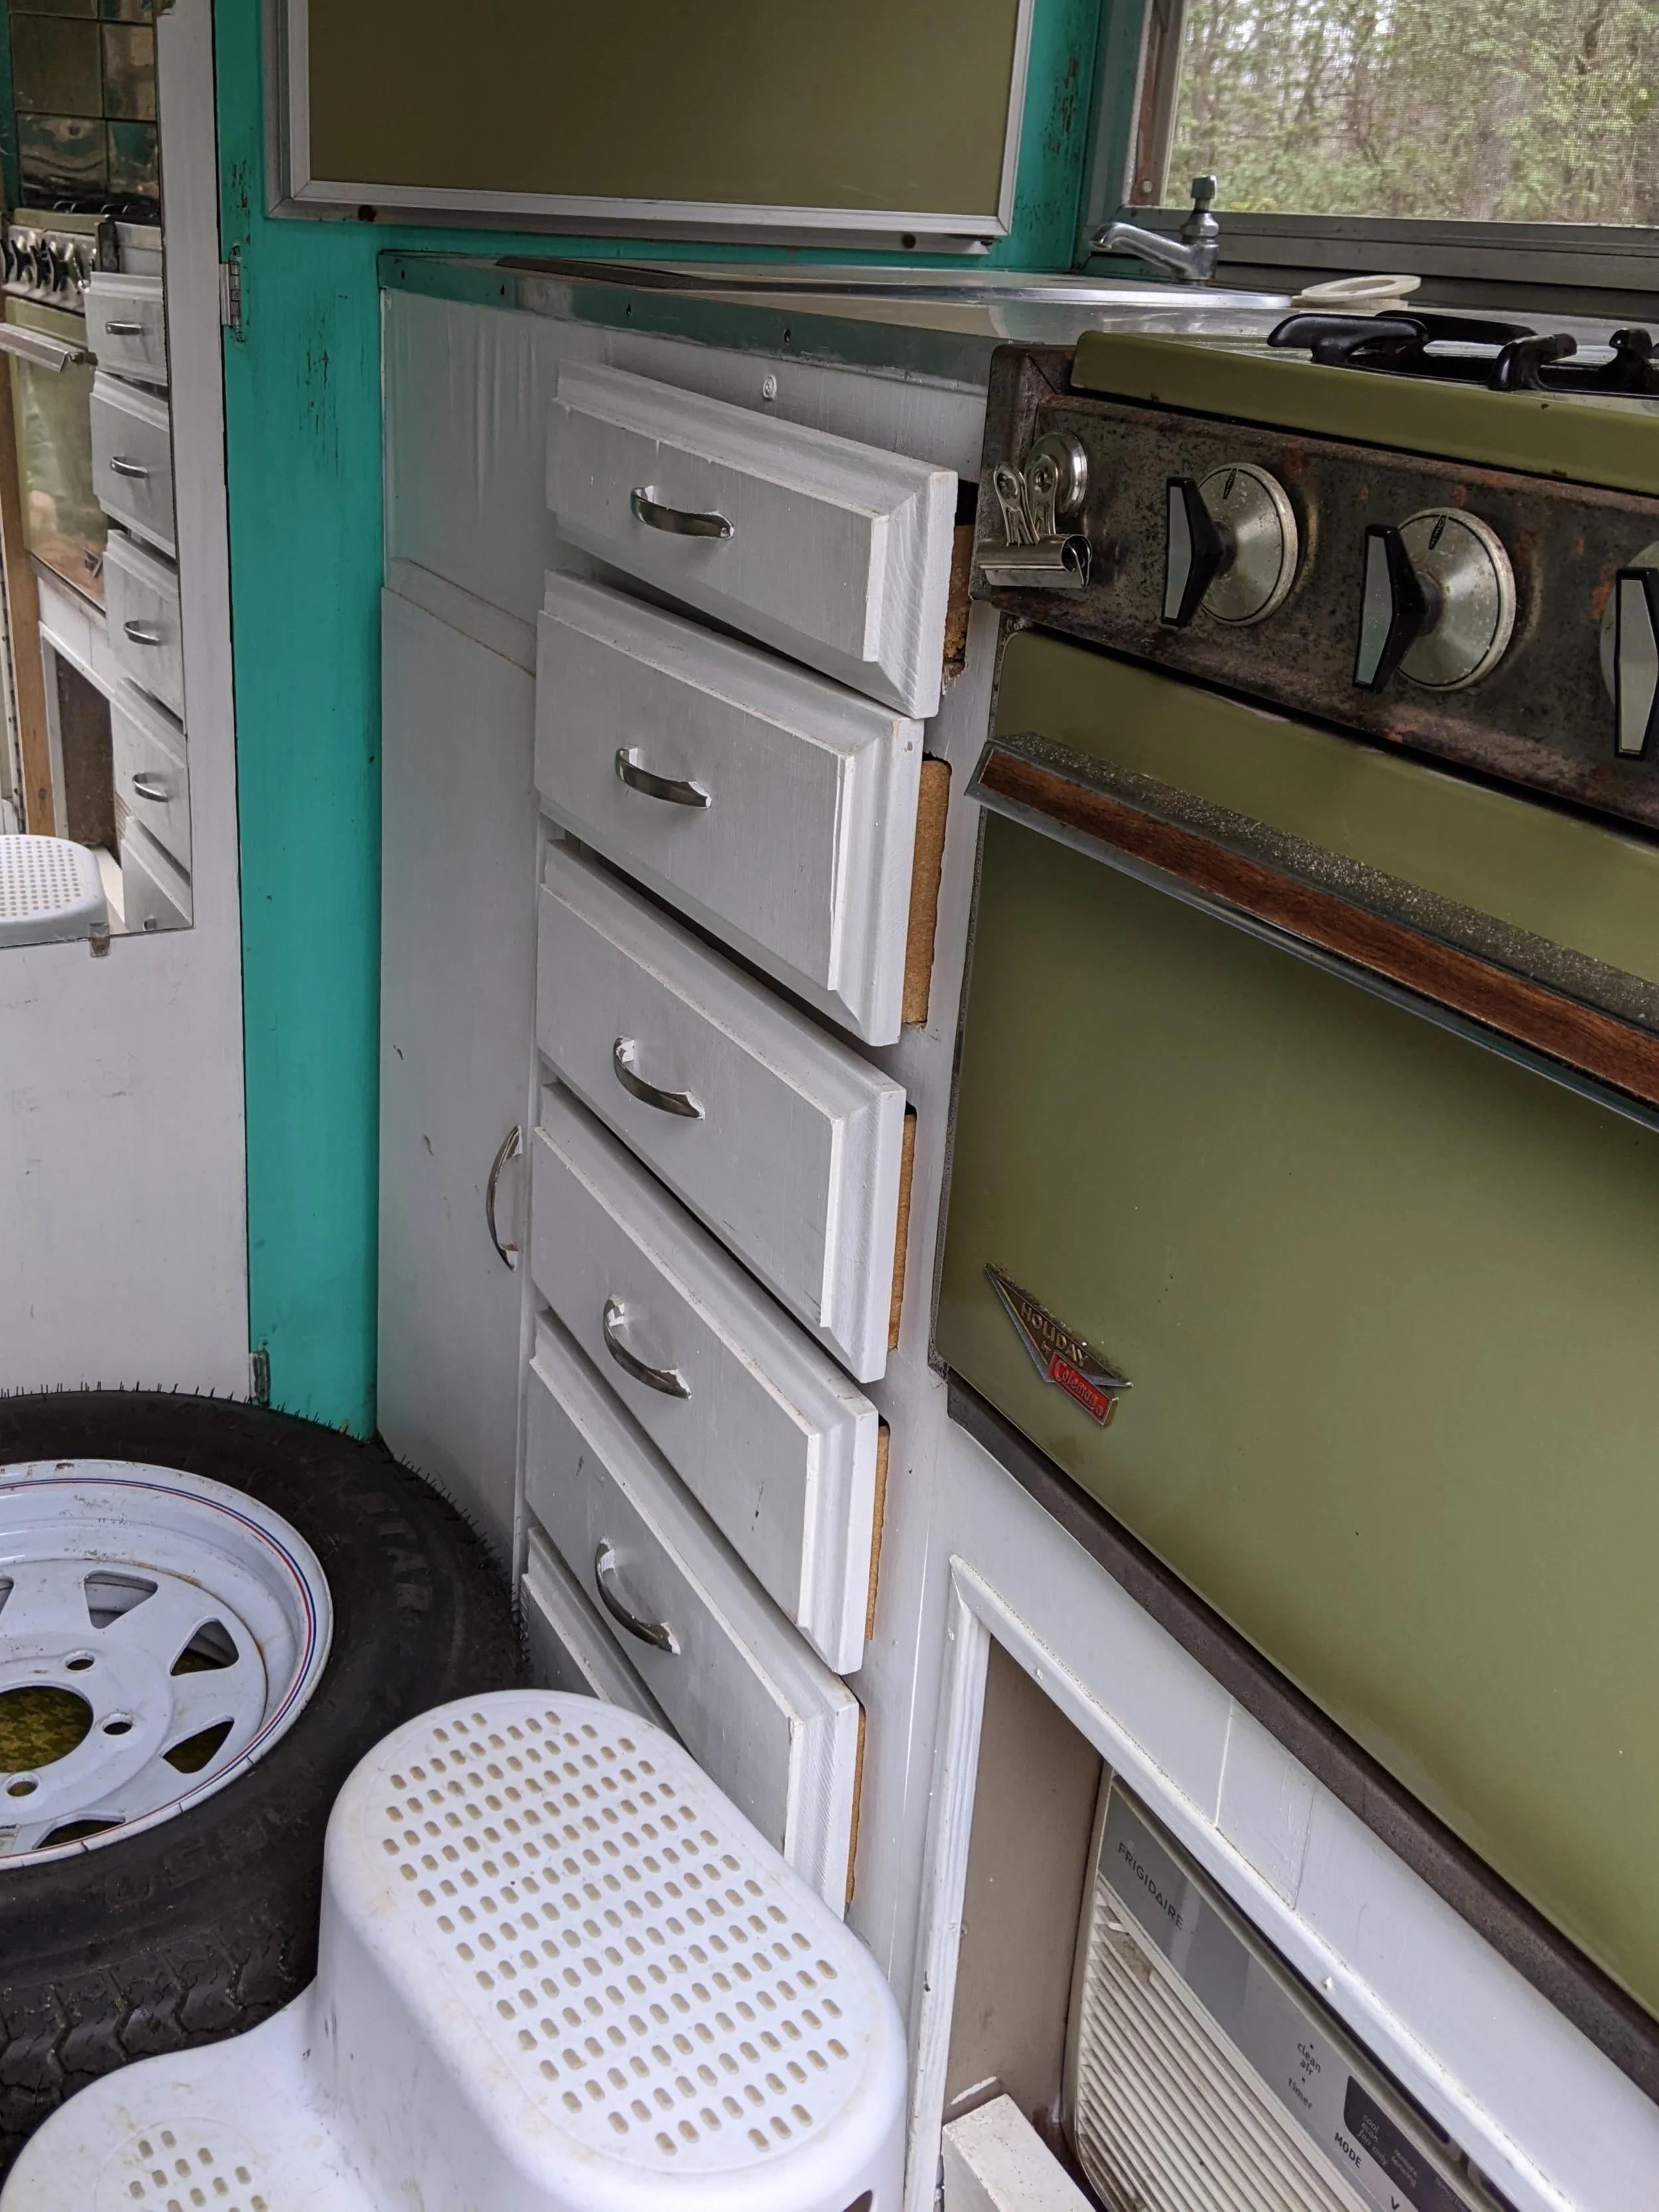
“We found our 1972 Shasta Compact trailer in 2013. We had a small amount of work done on it to make it functional for us. We loved the original trim and had a great time using it for short trips but it had some serious limitations. We kept it outside, uncovered as it had probably been for the better part of its previous 40 years of existence. In 2023 we made a decision to have it renovated rather than purchasing a new camper. Our first goal was to ensure that it was structurally sound for longer trips. We also wanted to make it more comfortable and add more modern capabilities.
We shopped around for a few estimates and ideas for how to best go about the renovation. Friends of ours introduced us to Andrew and Hillary from Rambler Designs. Andrew did as in depth of an assessment as he could without stripping off the skins and we determined the work required to achieve our primary goal of being able to safely go on longer road trips. We also requested several estimates for additional renovations and features. Once they got into the job and gradually removed all the skins, we found that there was a lot more damage to the frame than originally thought. They were meticulous throughout the process, sharing their findings along with many detailed photos, so we were able to assess the situation and make decisions.
When the job was complete we basically had a new ‘72 Shasta Compact trailer, same original exterior and totally renovated interior with modern conveniences including off-grid capabilities. Due to my procrastination, I’m writing this review after we’ve enjoyed several long adventures with our renovated Shasta from our home base in Atlanta, including Sedona, AZ and the Grand Canyon, Door County, WI and other areas on Lake Michigan, as well as the Upper Peninsula, Michigan and many beautiful towns/areas around Lake Superior. Hillary and Andrew were great to work with throughout the process, always keeping us informed, making sound recommendations and providing excellent craftsmanship and quality. We could not be more thrilled with the outcome of this project and highly recommend Rambler Designs for any of your small or large travel trailer or camper van projects.”

Work Completed
For this project, our clients wanted to restore their vintage 1972 Shasta Compact travel trailer. This trailer had serious water damage and structural issues when we received it. After removing the exterior aluminum skins, we realized that most of the framing was rotted from water intrusion. We rebuilt almost the entire trailer framing. Other improvements we made to the trailer include the following:
-
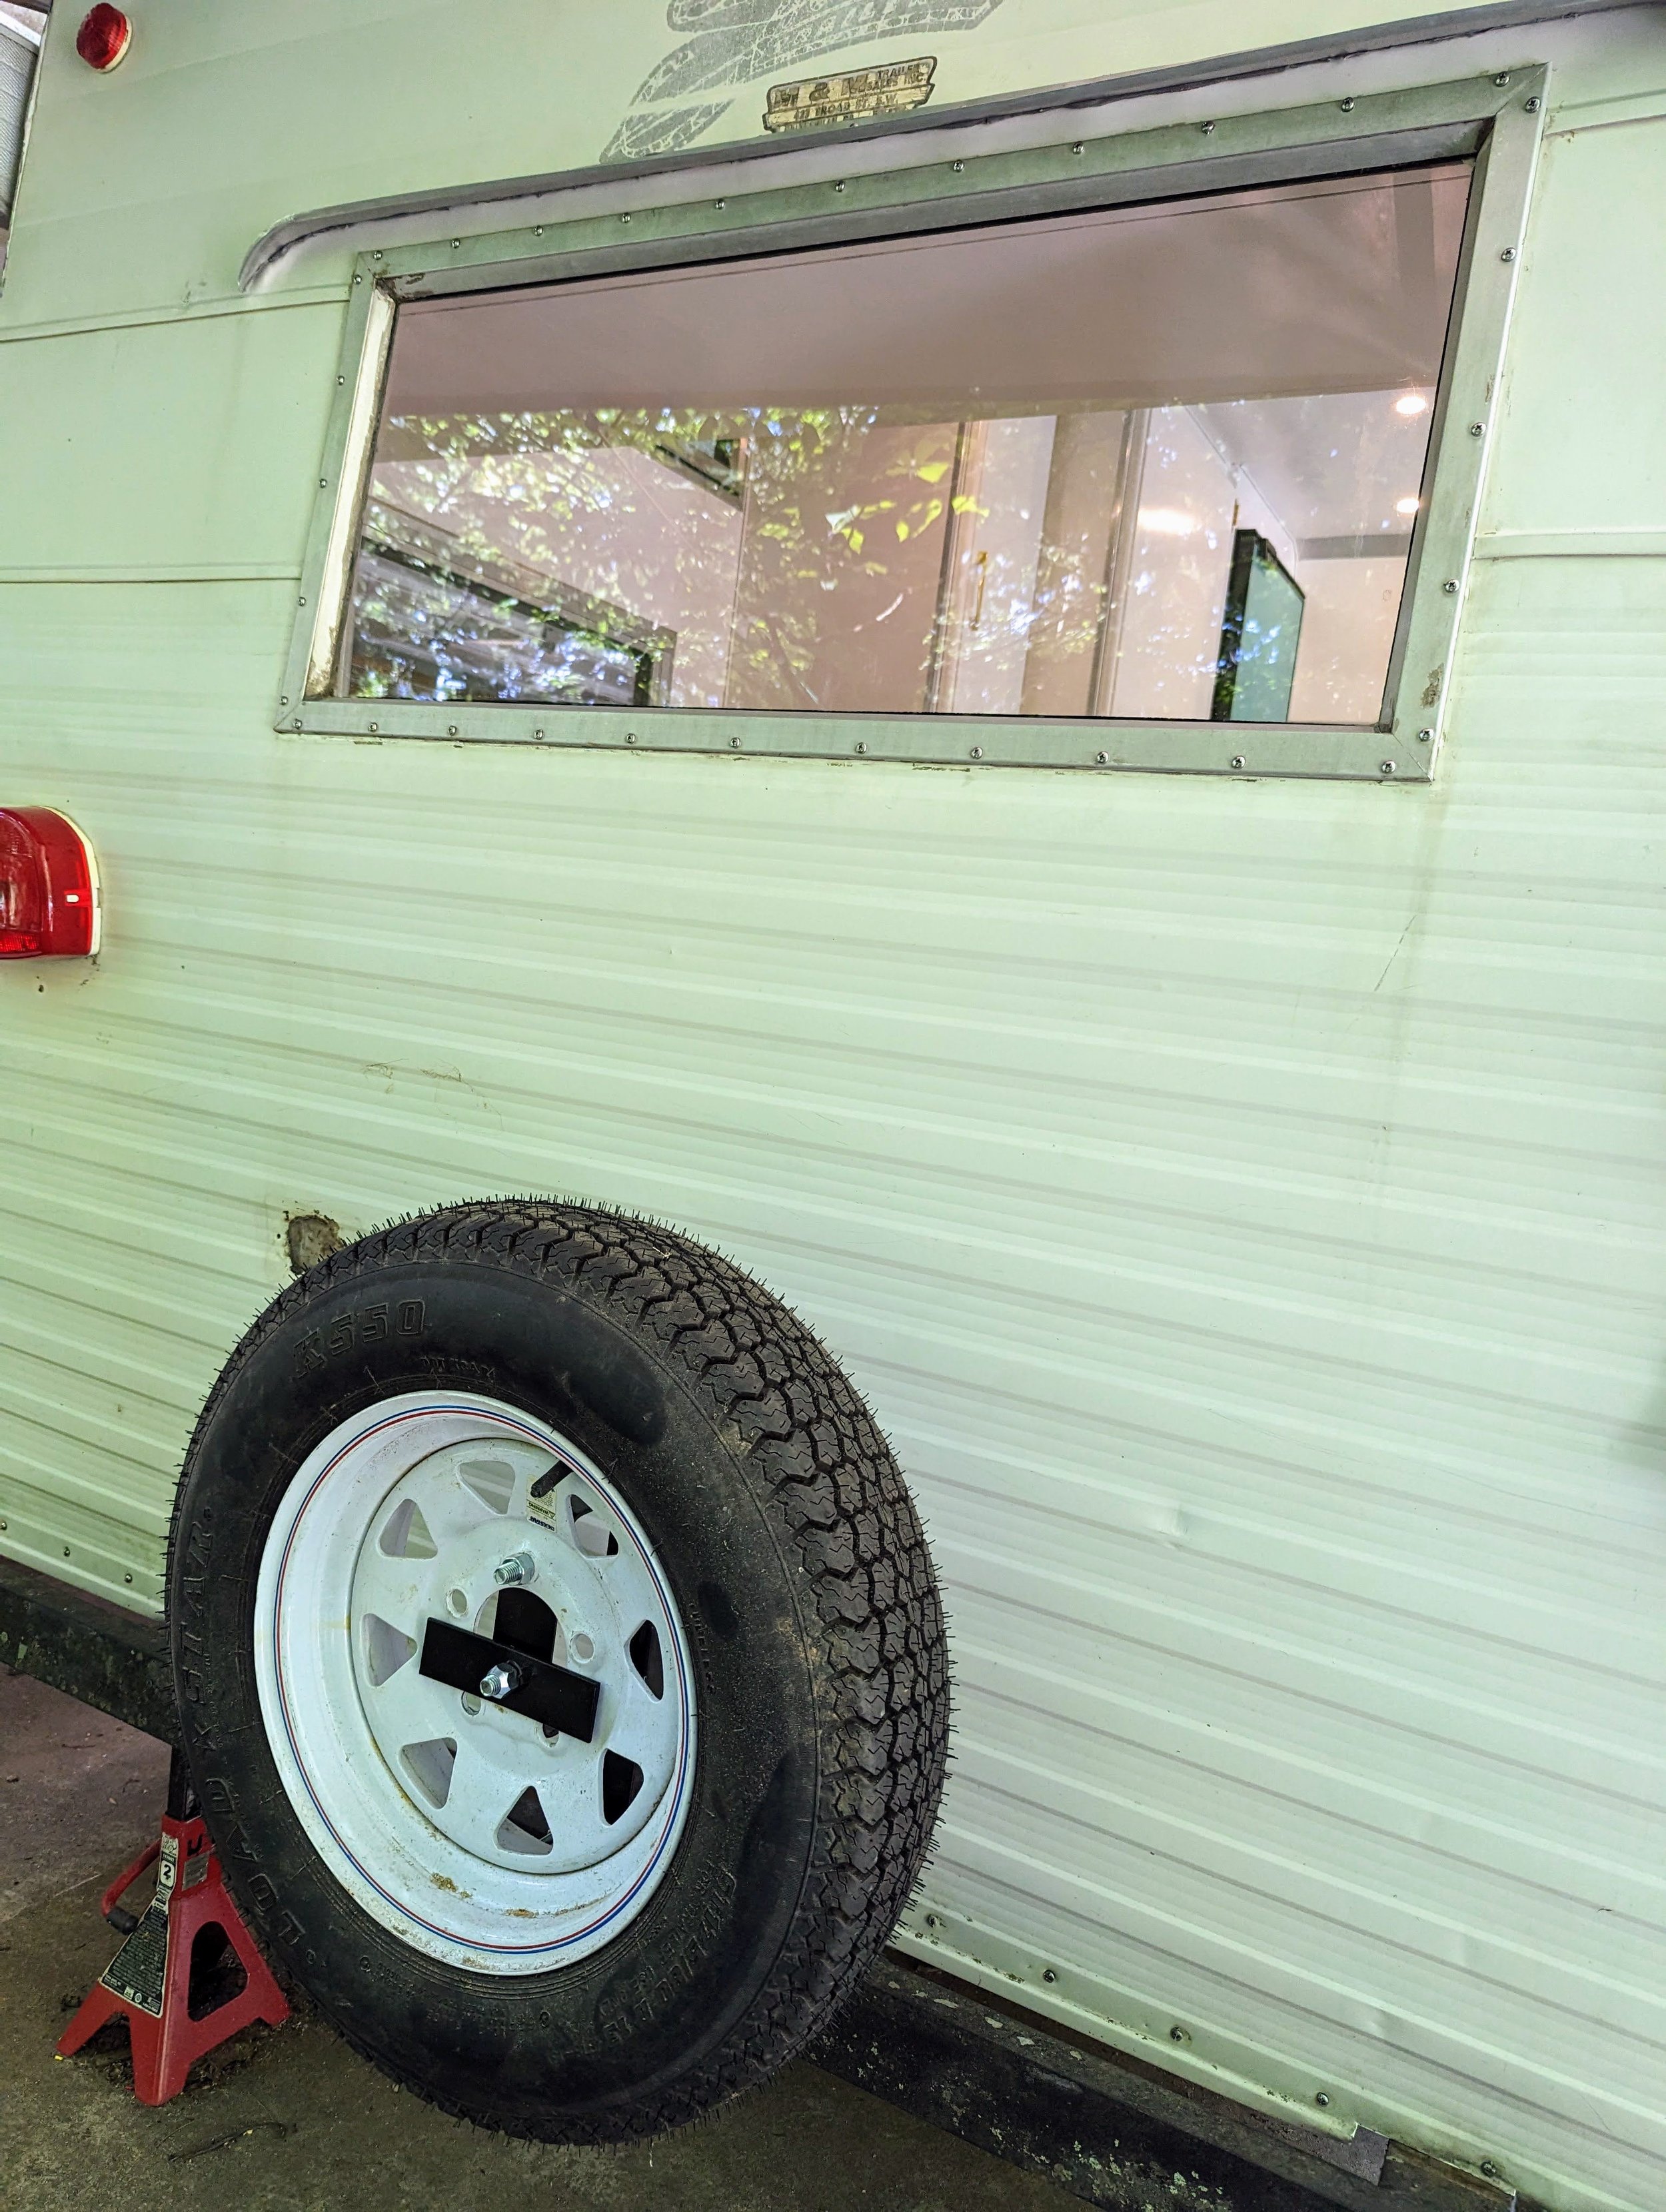
Repaired all leaks throughout by resealing windows, vents, j-rails, awning rails, and baggage doors with new butyl tape.
Holes in the skin of the trailer were repaired with JB Weld, Bondo, and sealant.
All hardware was replaced with exterior rated screws. Stainless steel used for visible screws.
All new insulation installed.
House wrap installed to provide a moisture barrier and additional water resistant barrier.
Added a second baggage door to the street side of the trailer.
-
Replaced rotten wood framing.
Replaced all insulation.
Replaced water damaged ceiling and wall panels with new 1/4” birch plywood panels.
Rebuilt water damaged cabinetry.
-
New cabinetry, drawers, drawer fronts, and drawer pulls.
Tip-out tray installed on the false front drawer under the sink.
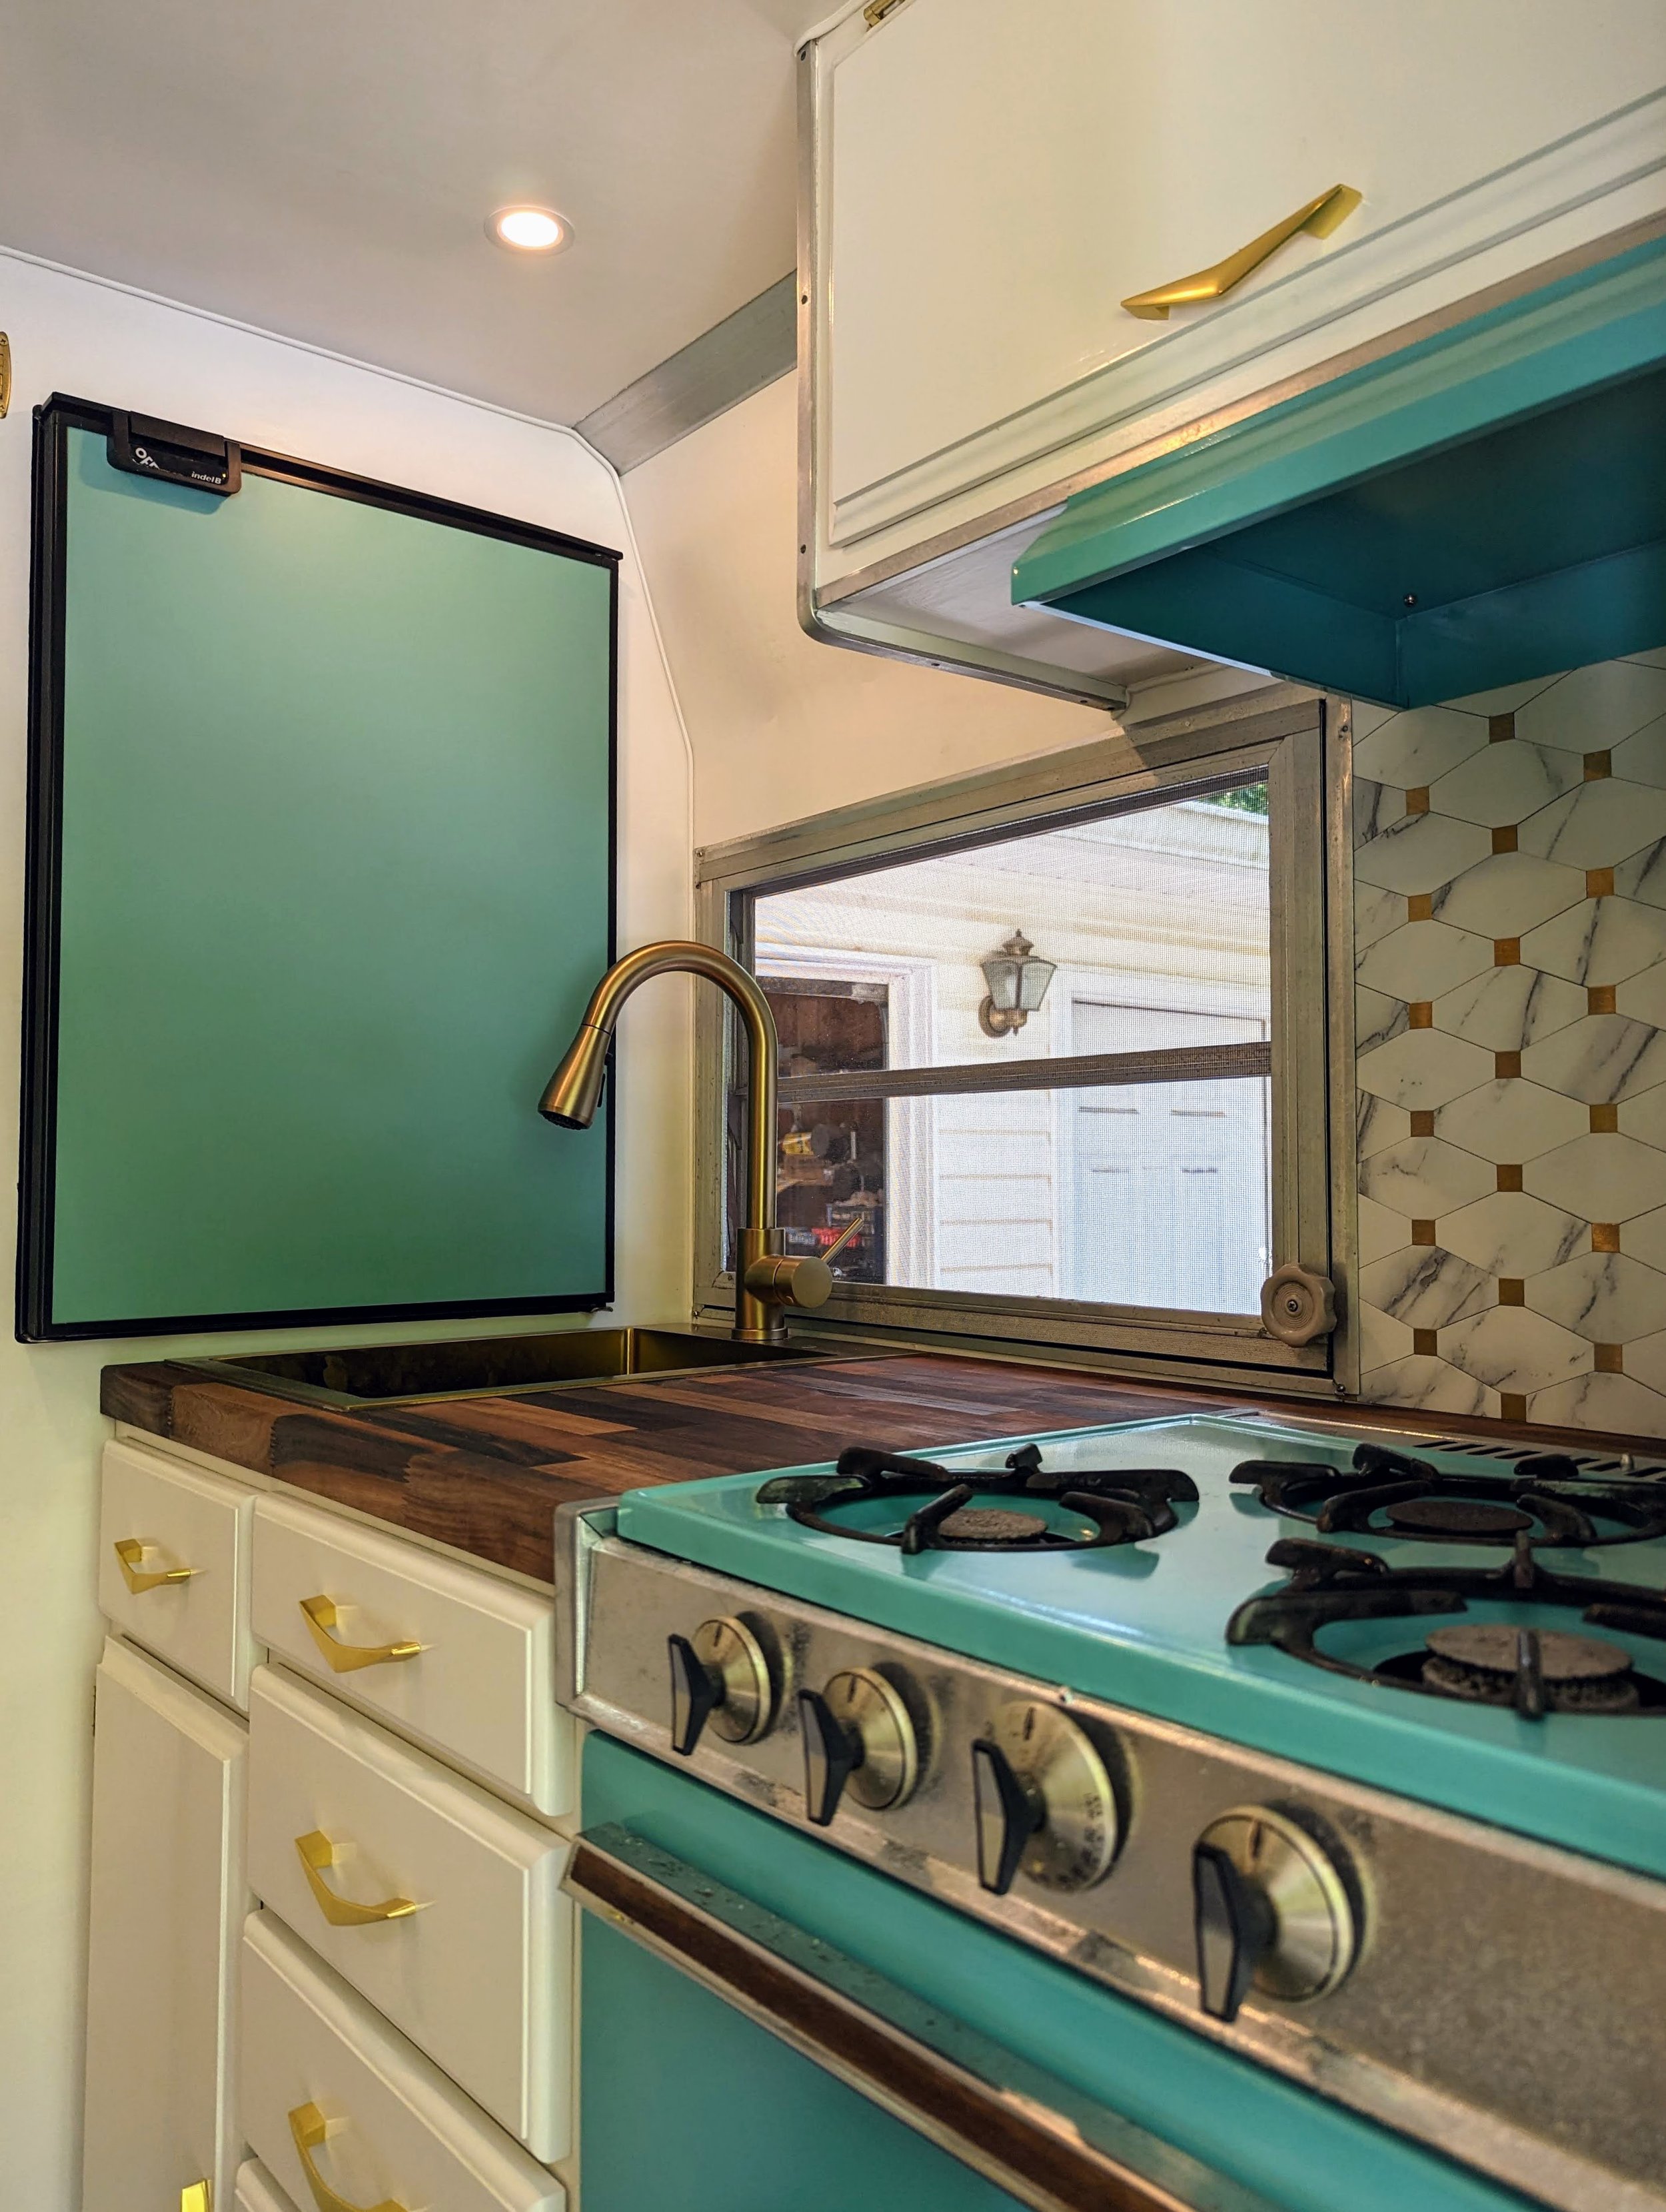
12V Indel CR130 fridge to replace the existing ice box.
Walnut butcher block countertop.
New stainless steel sink and faucet.
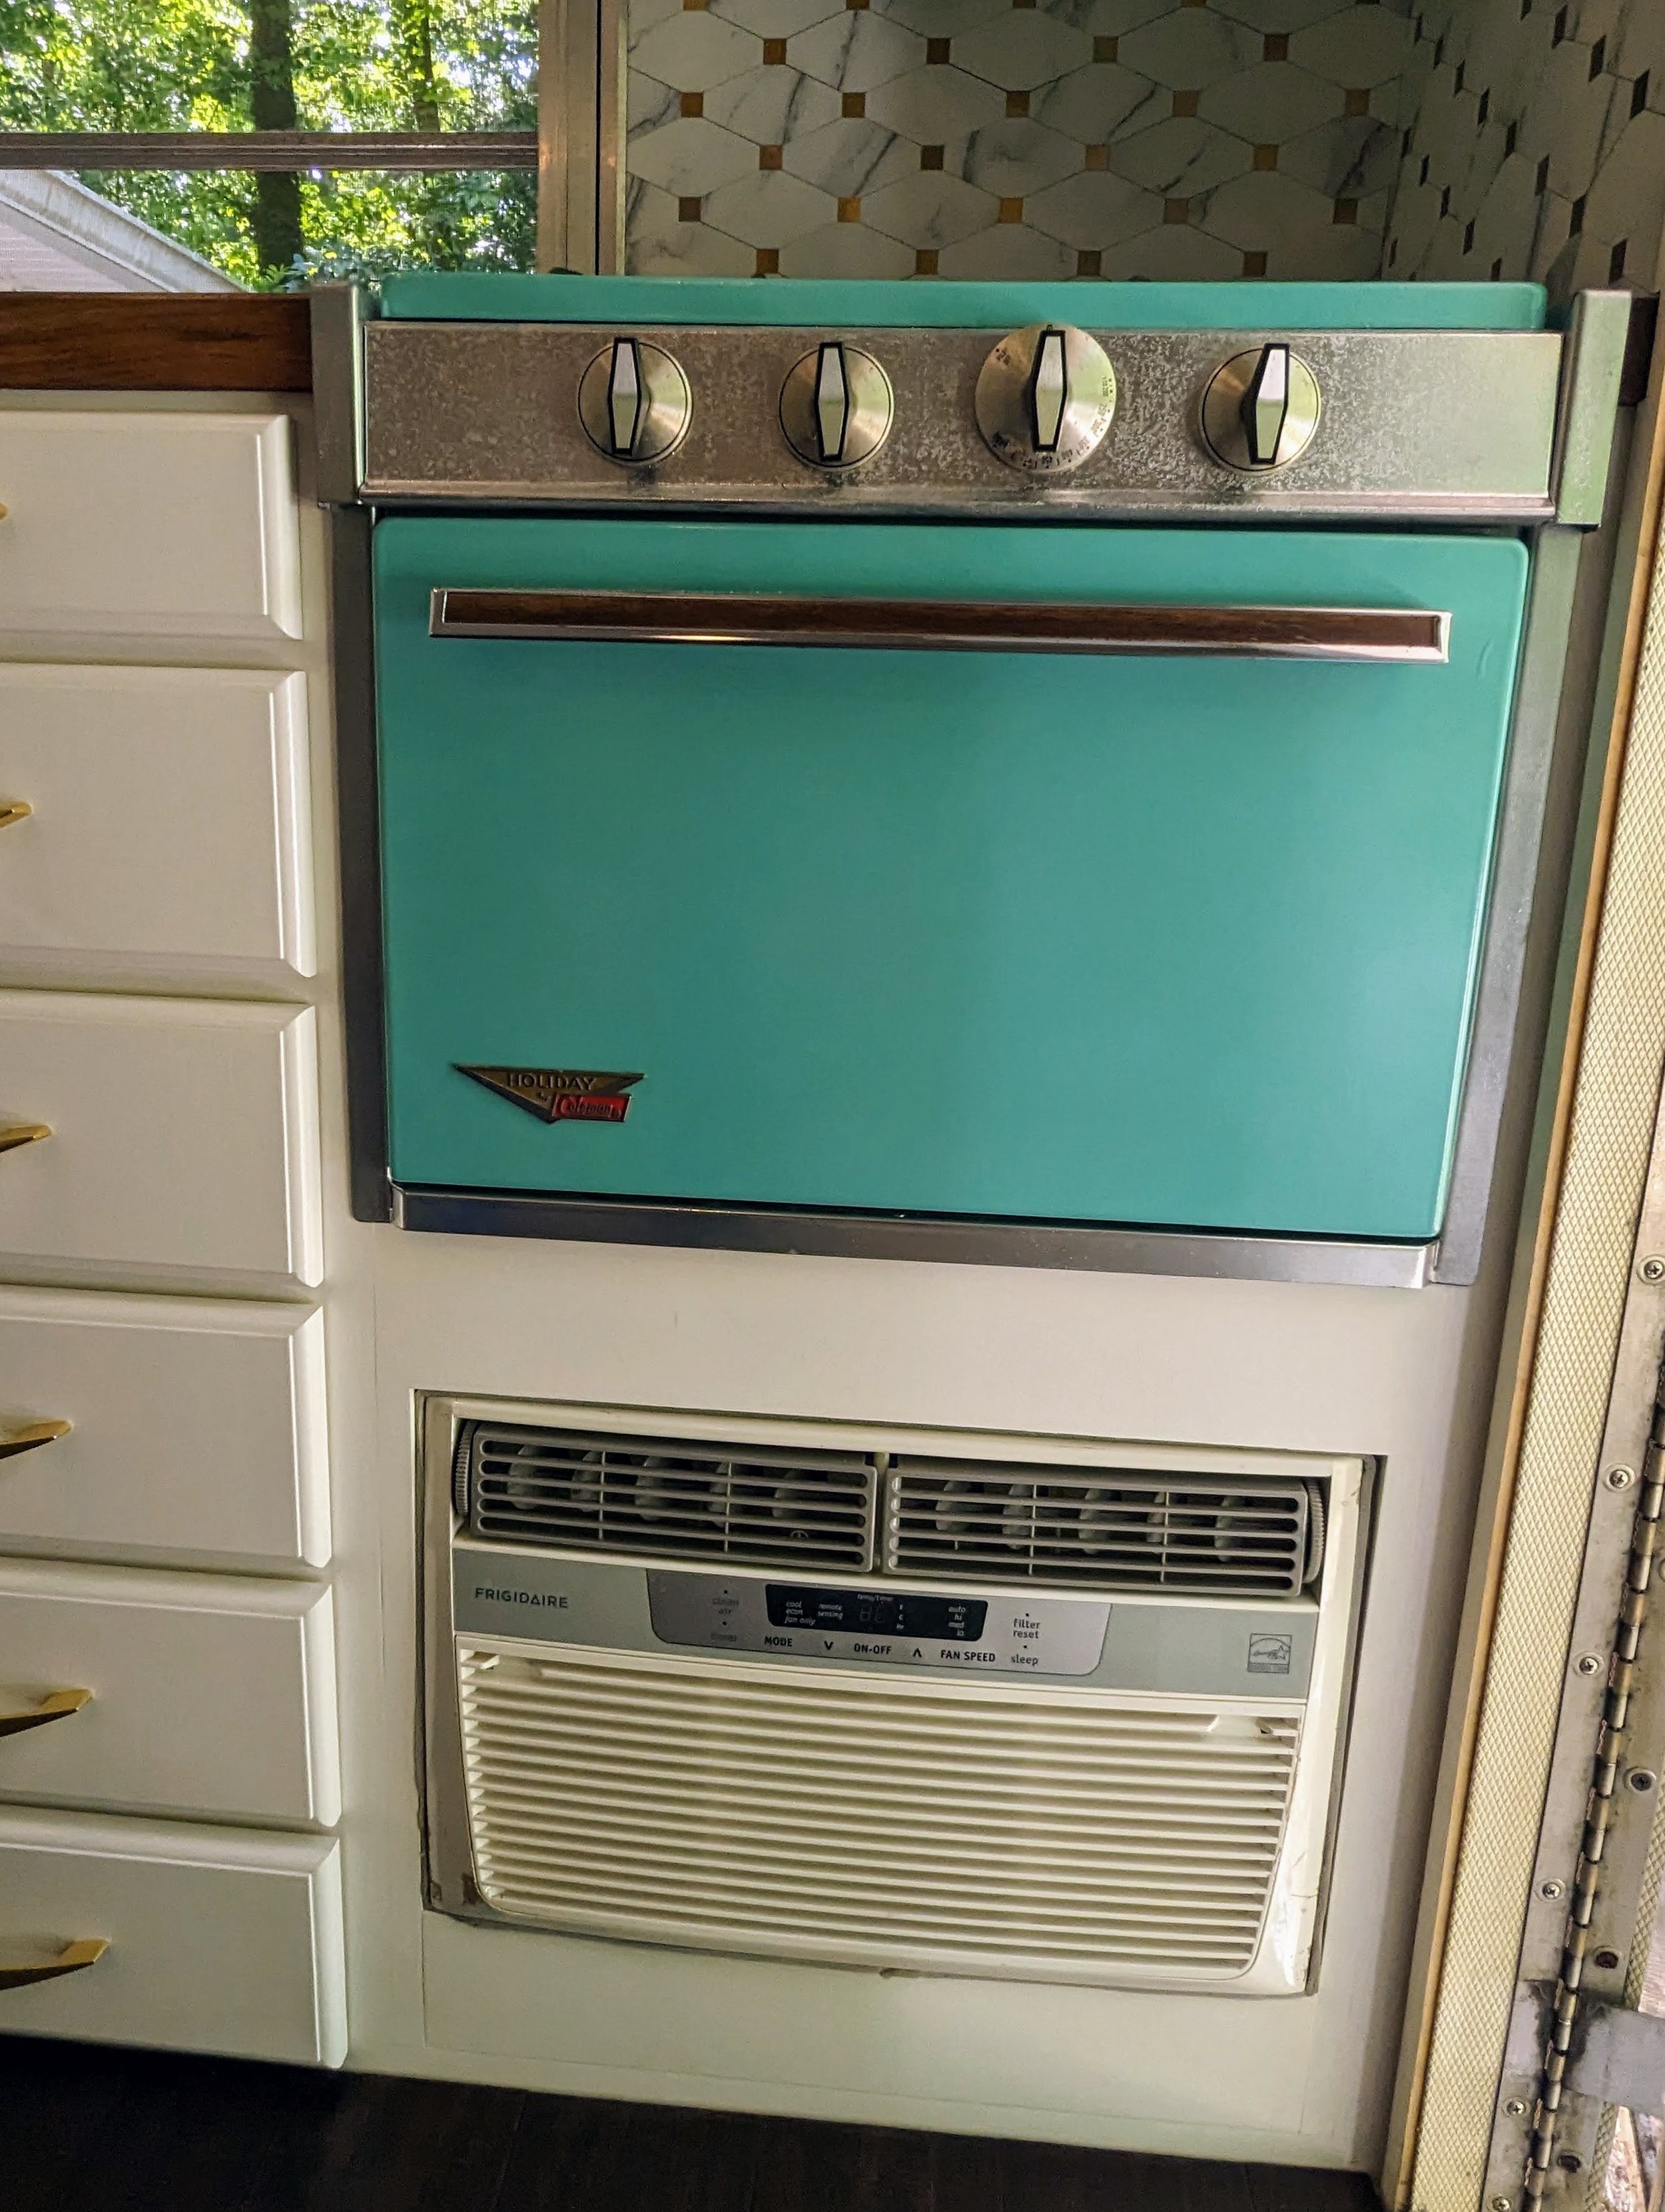
Rust removal and powder coating of oven and range combo.
12V LED lighting over the countertop.
Stick on tile backsplash installed.
-
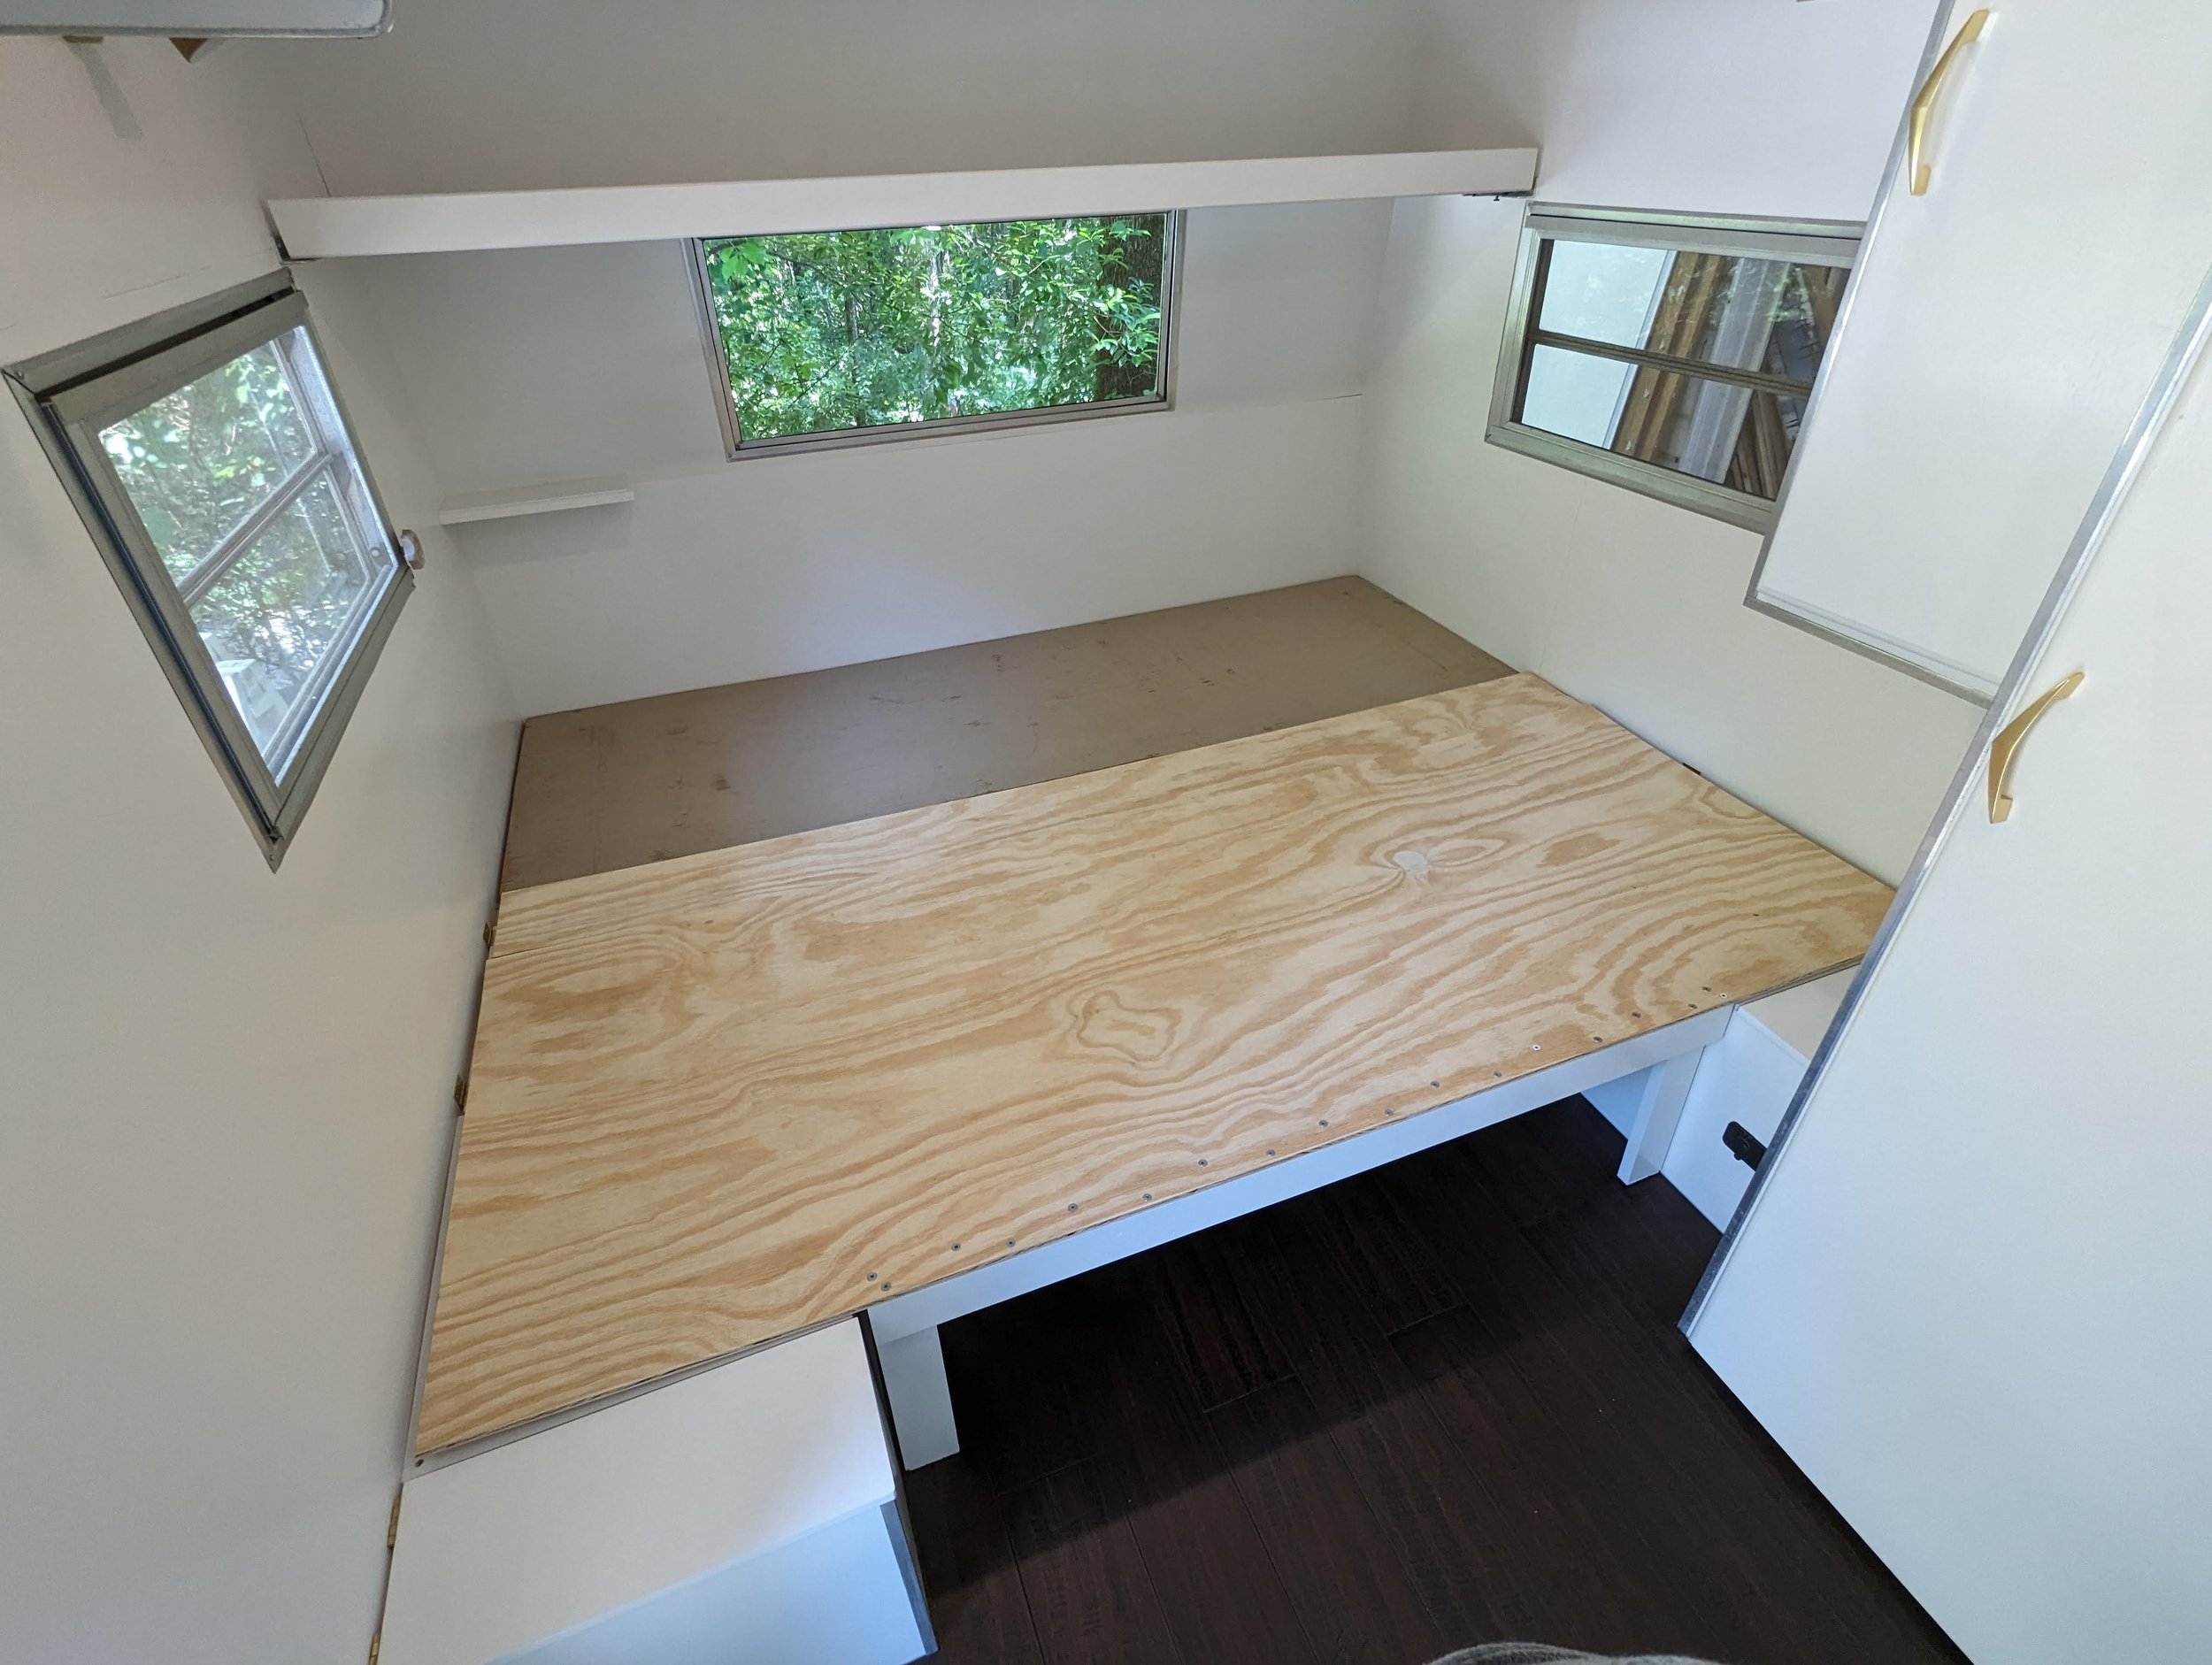
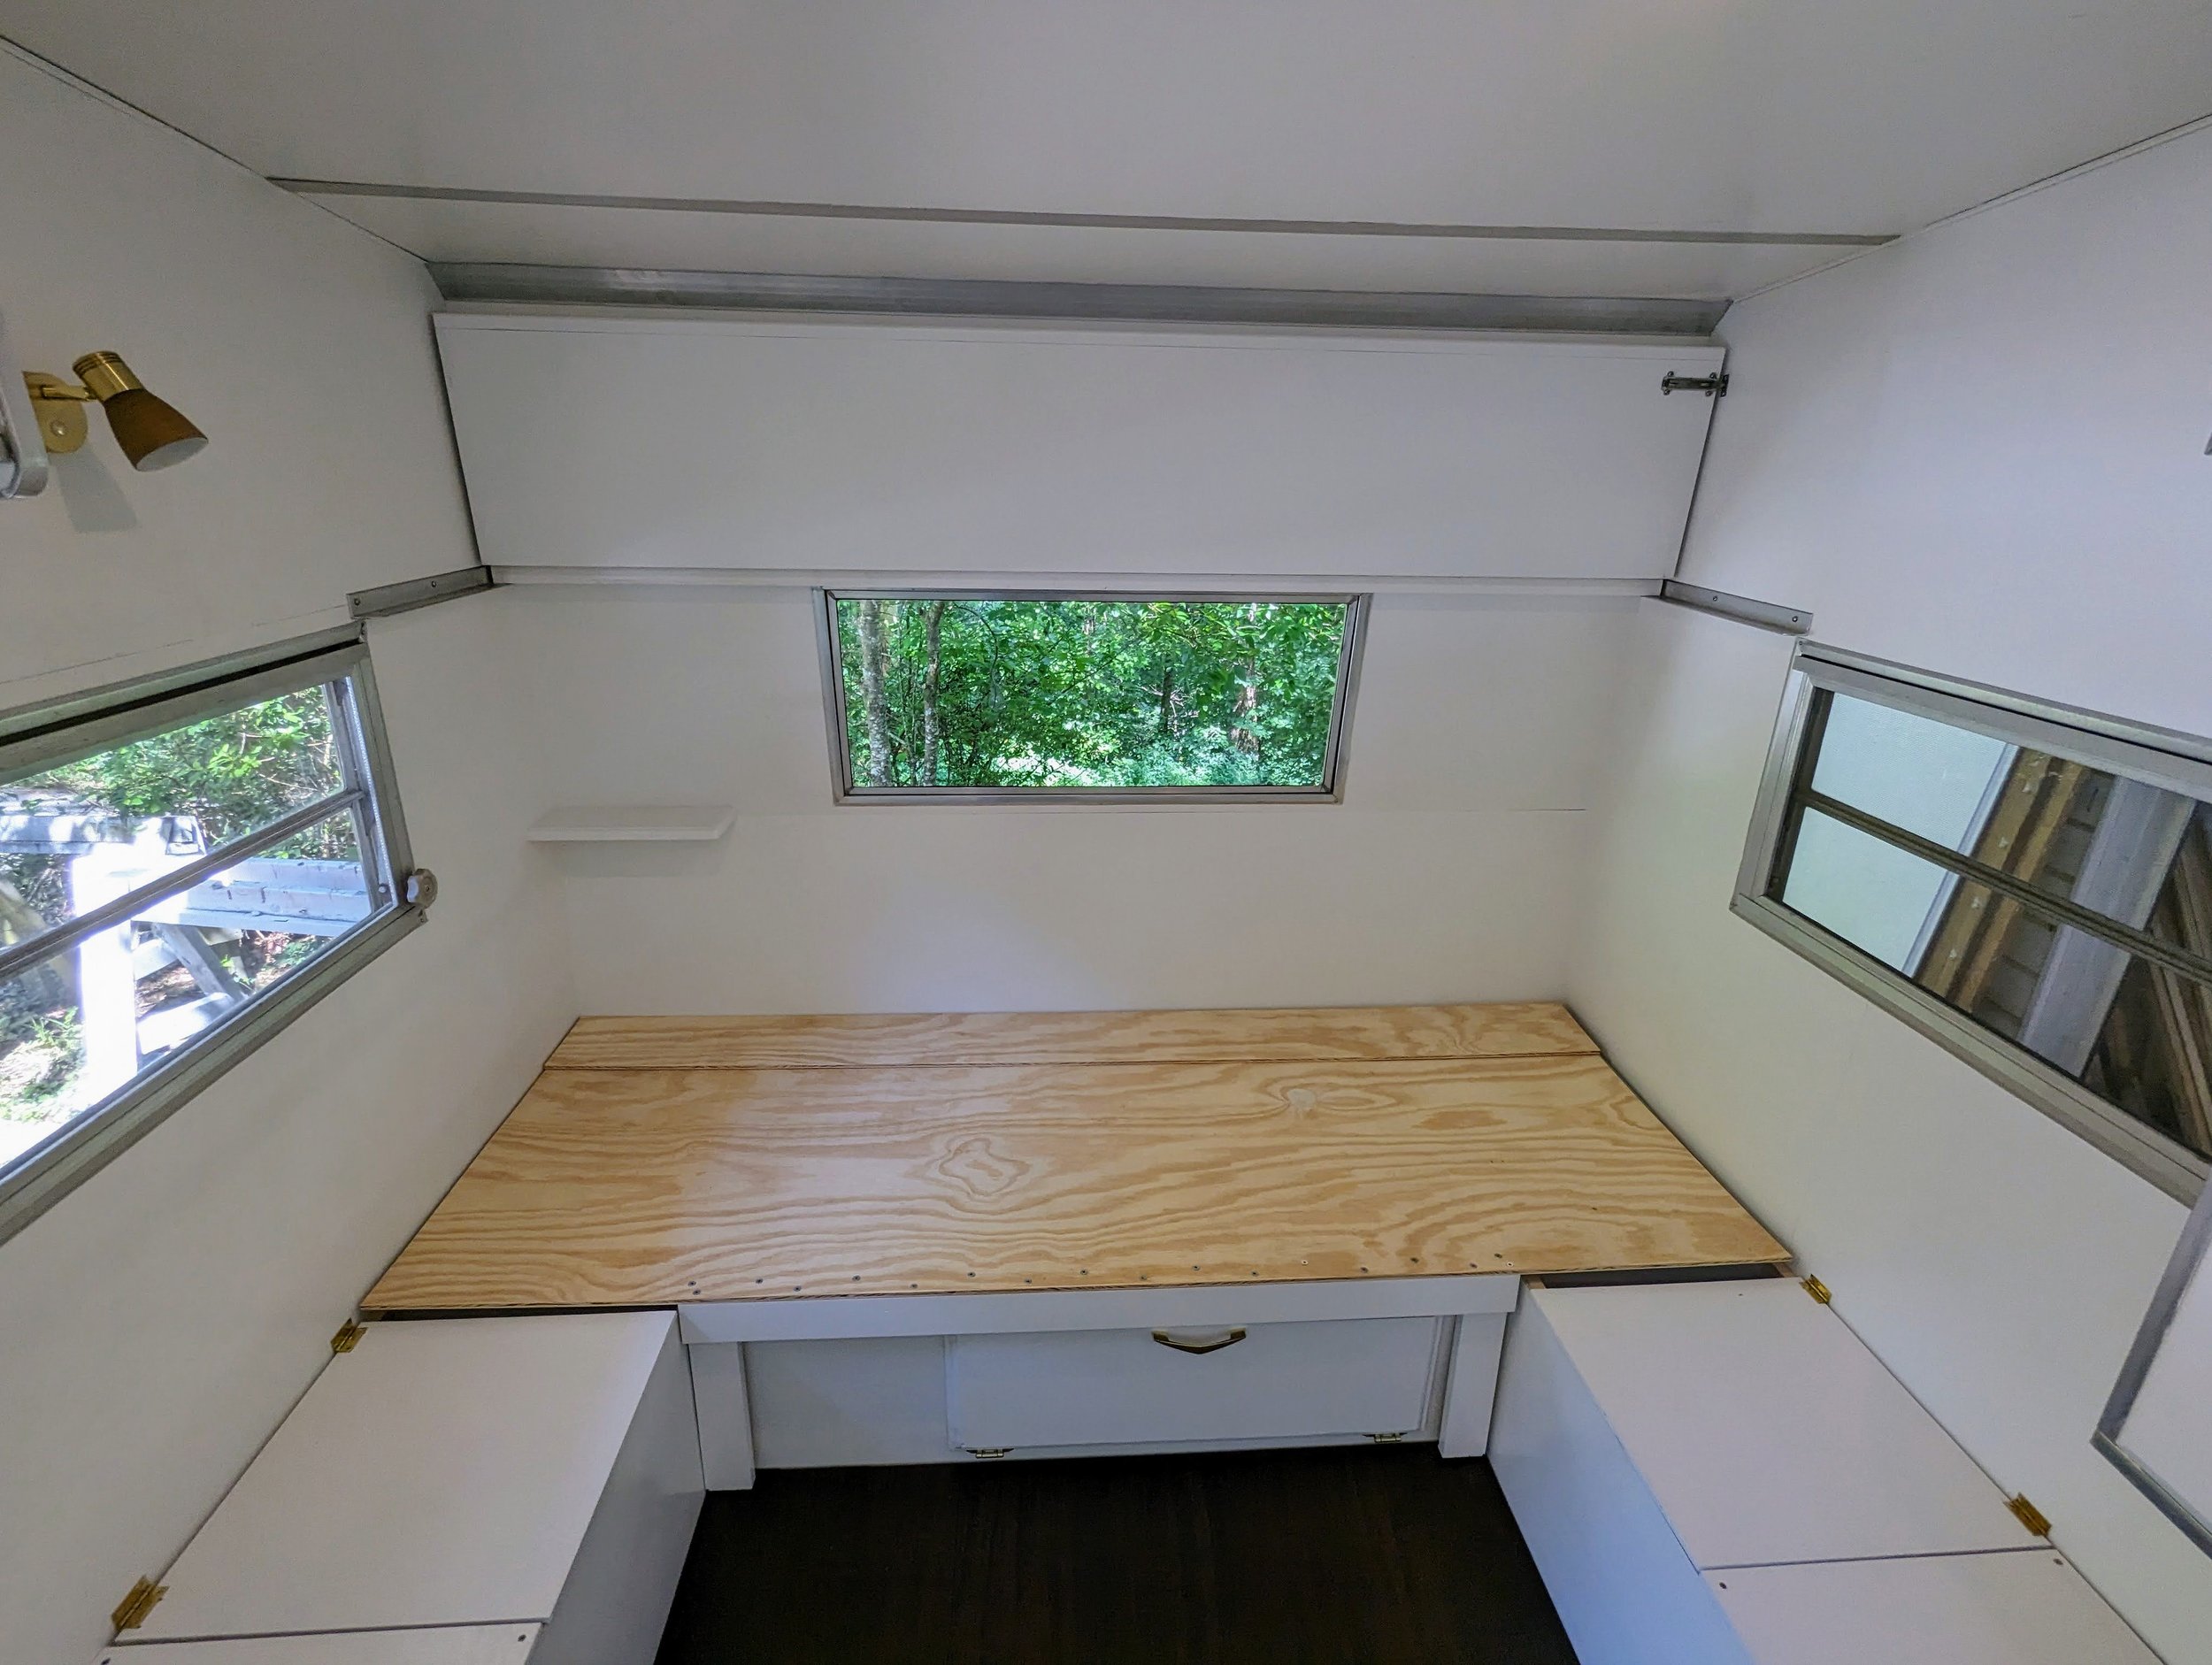
Replace the bunk bed with a storage shelf that can be locked up out of the way.
Convert the full bed to a queen bed.
The full length cabinet next to the bed was converted to half length to allow for the bed size increase.
Bedside shelf added.
12V dimmable LED reading lamp installed.
-
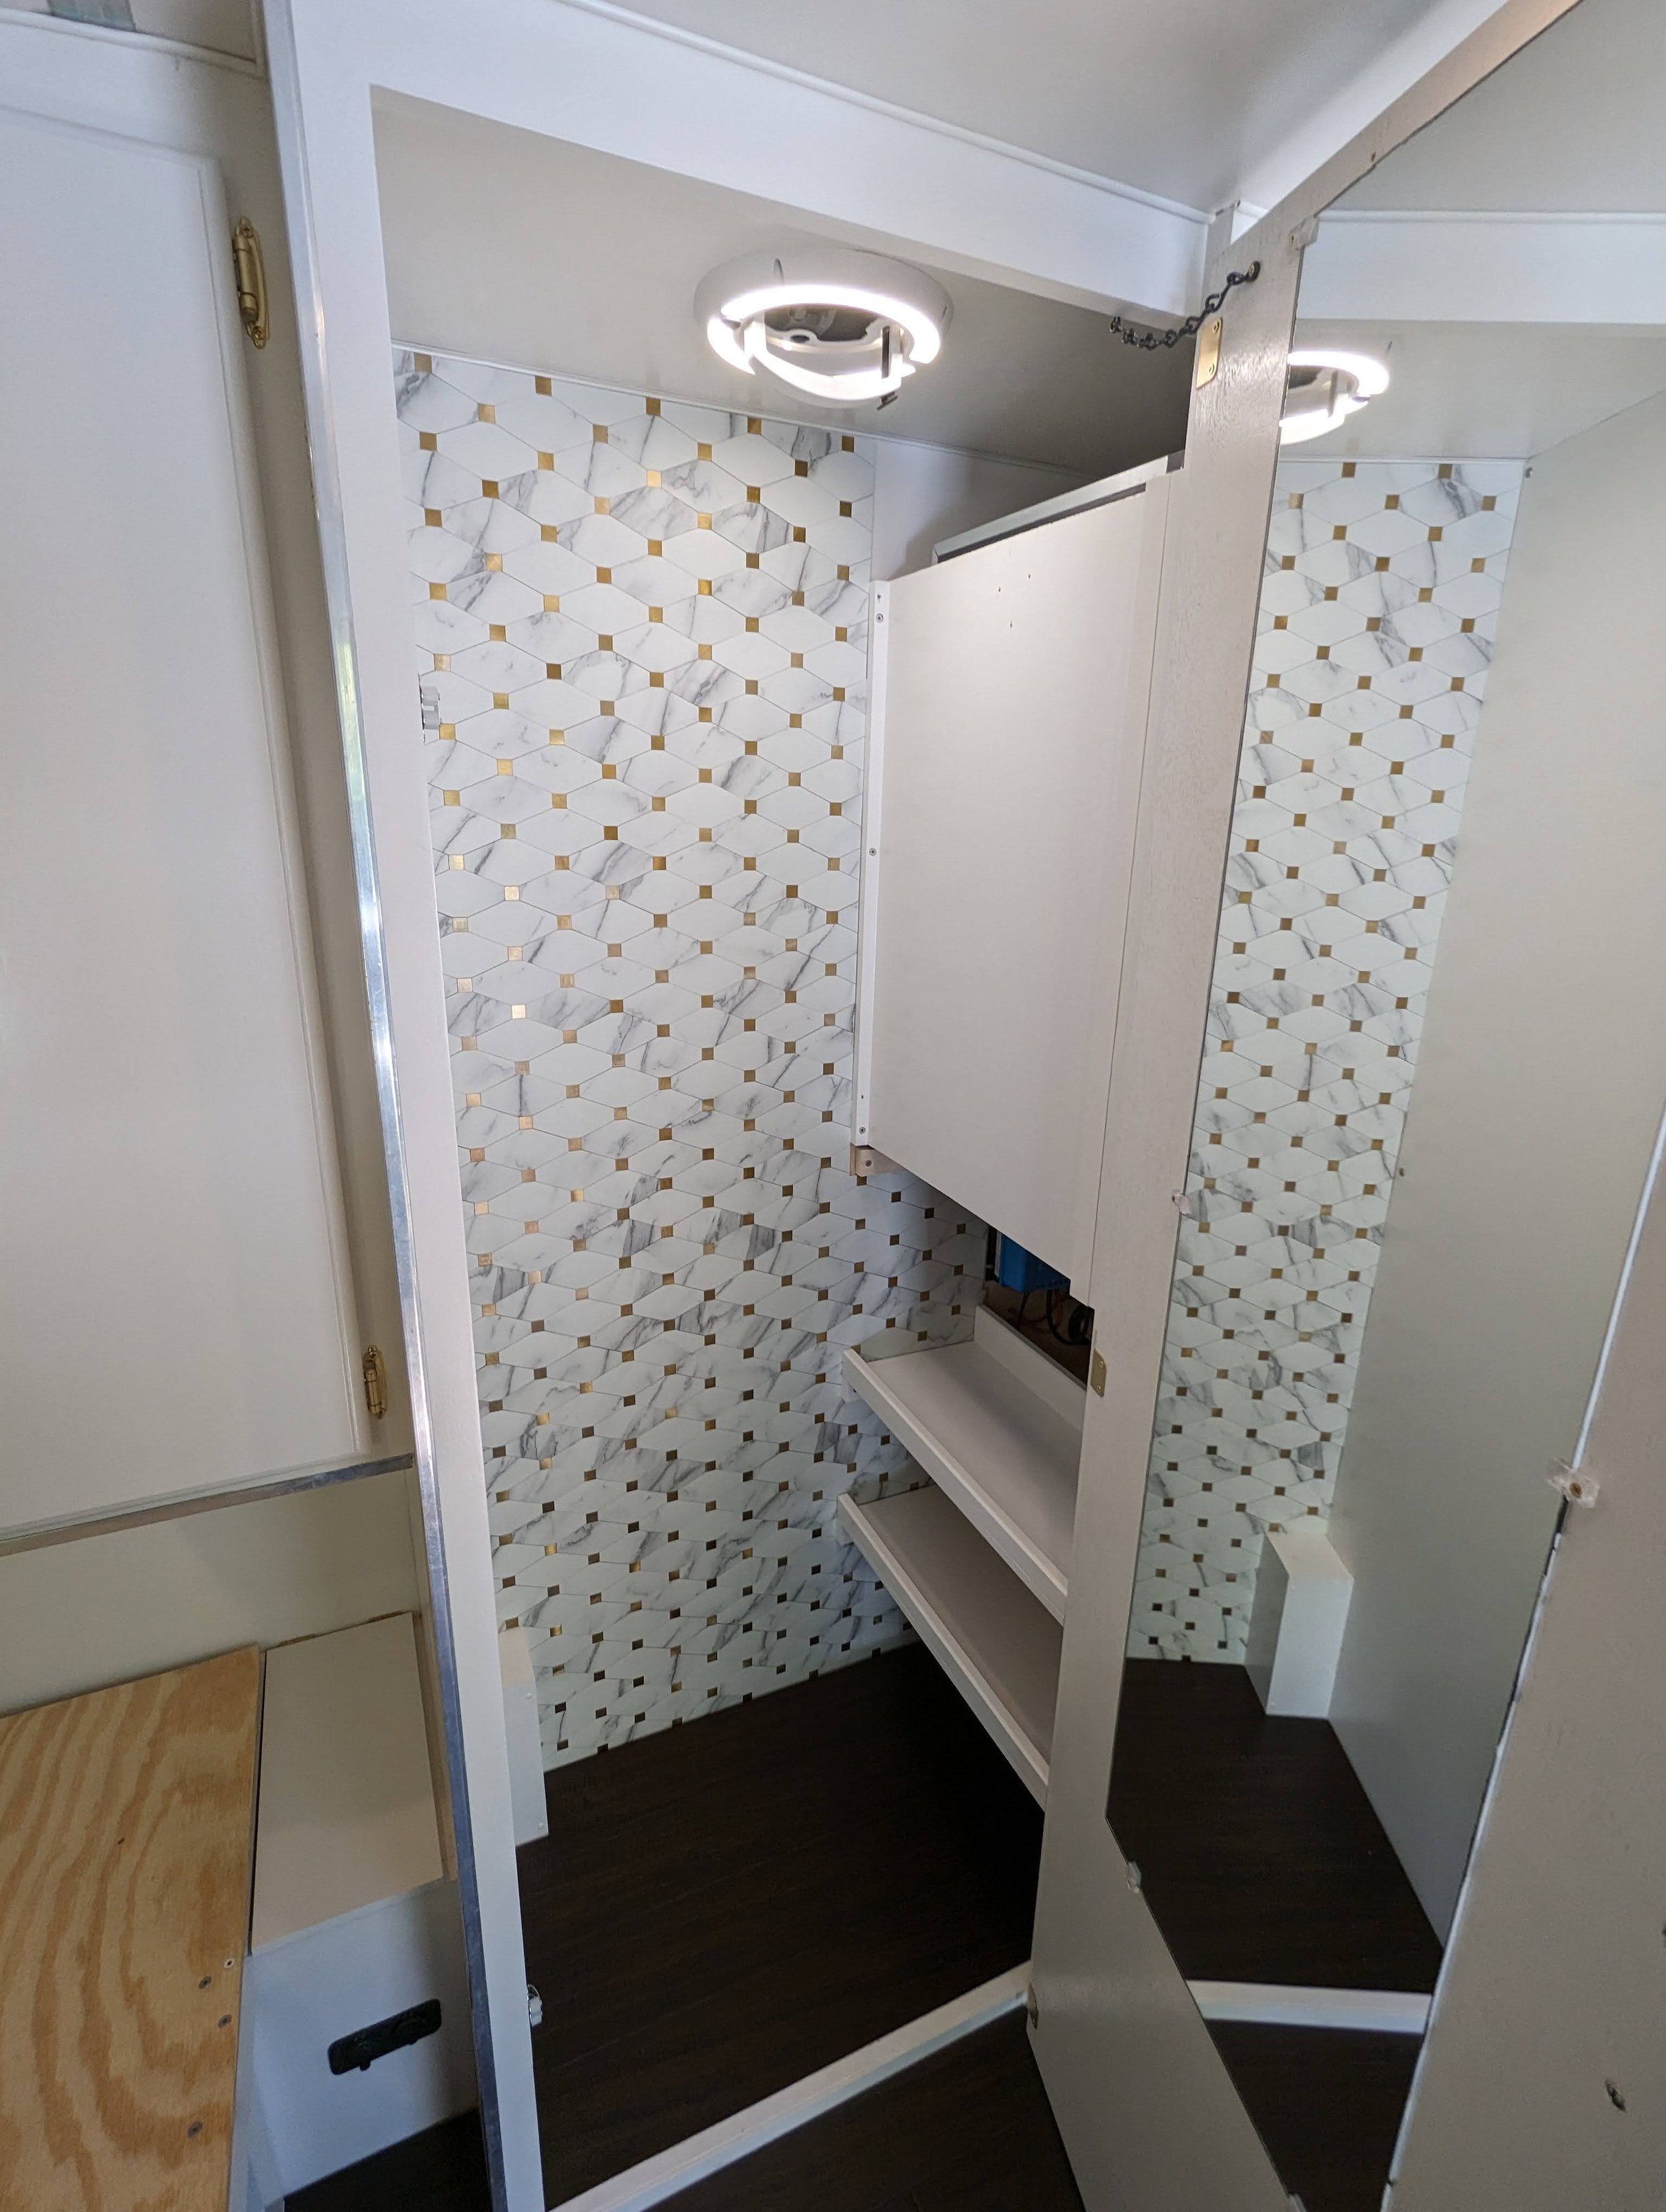
Increased the width of the closet by six inches. The door and doorway were also increased by the same amount.
The cabinet next to the closet decreased in width by six inches due to closet width increase.
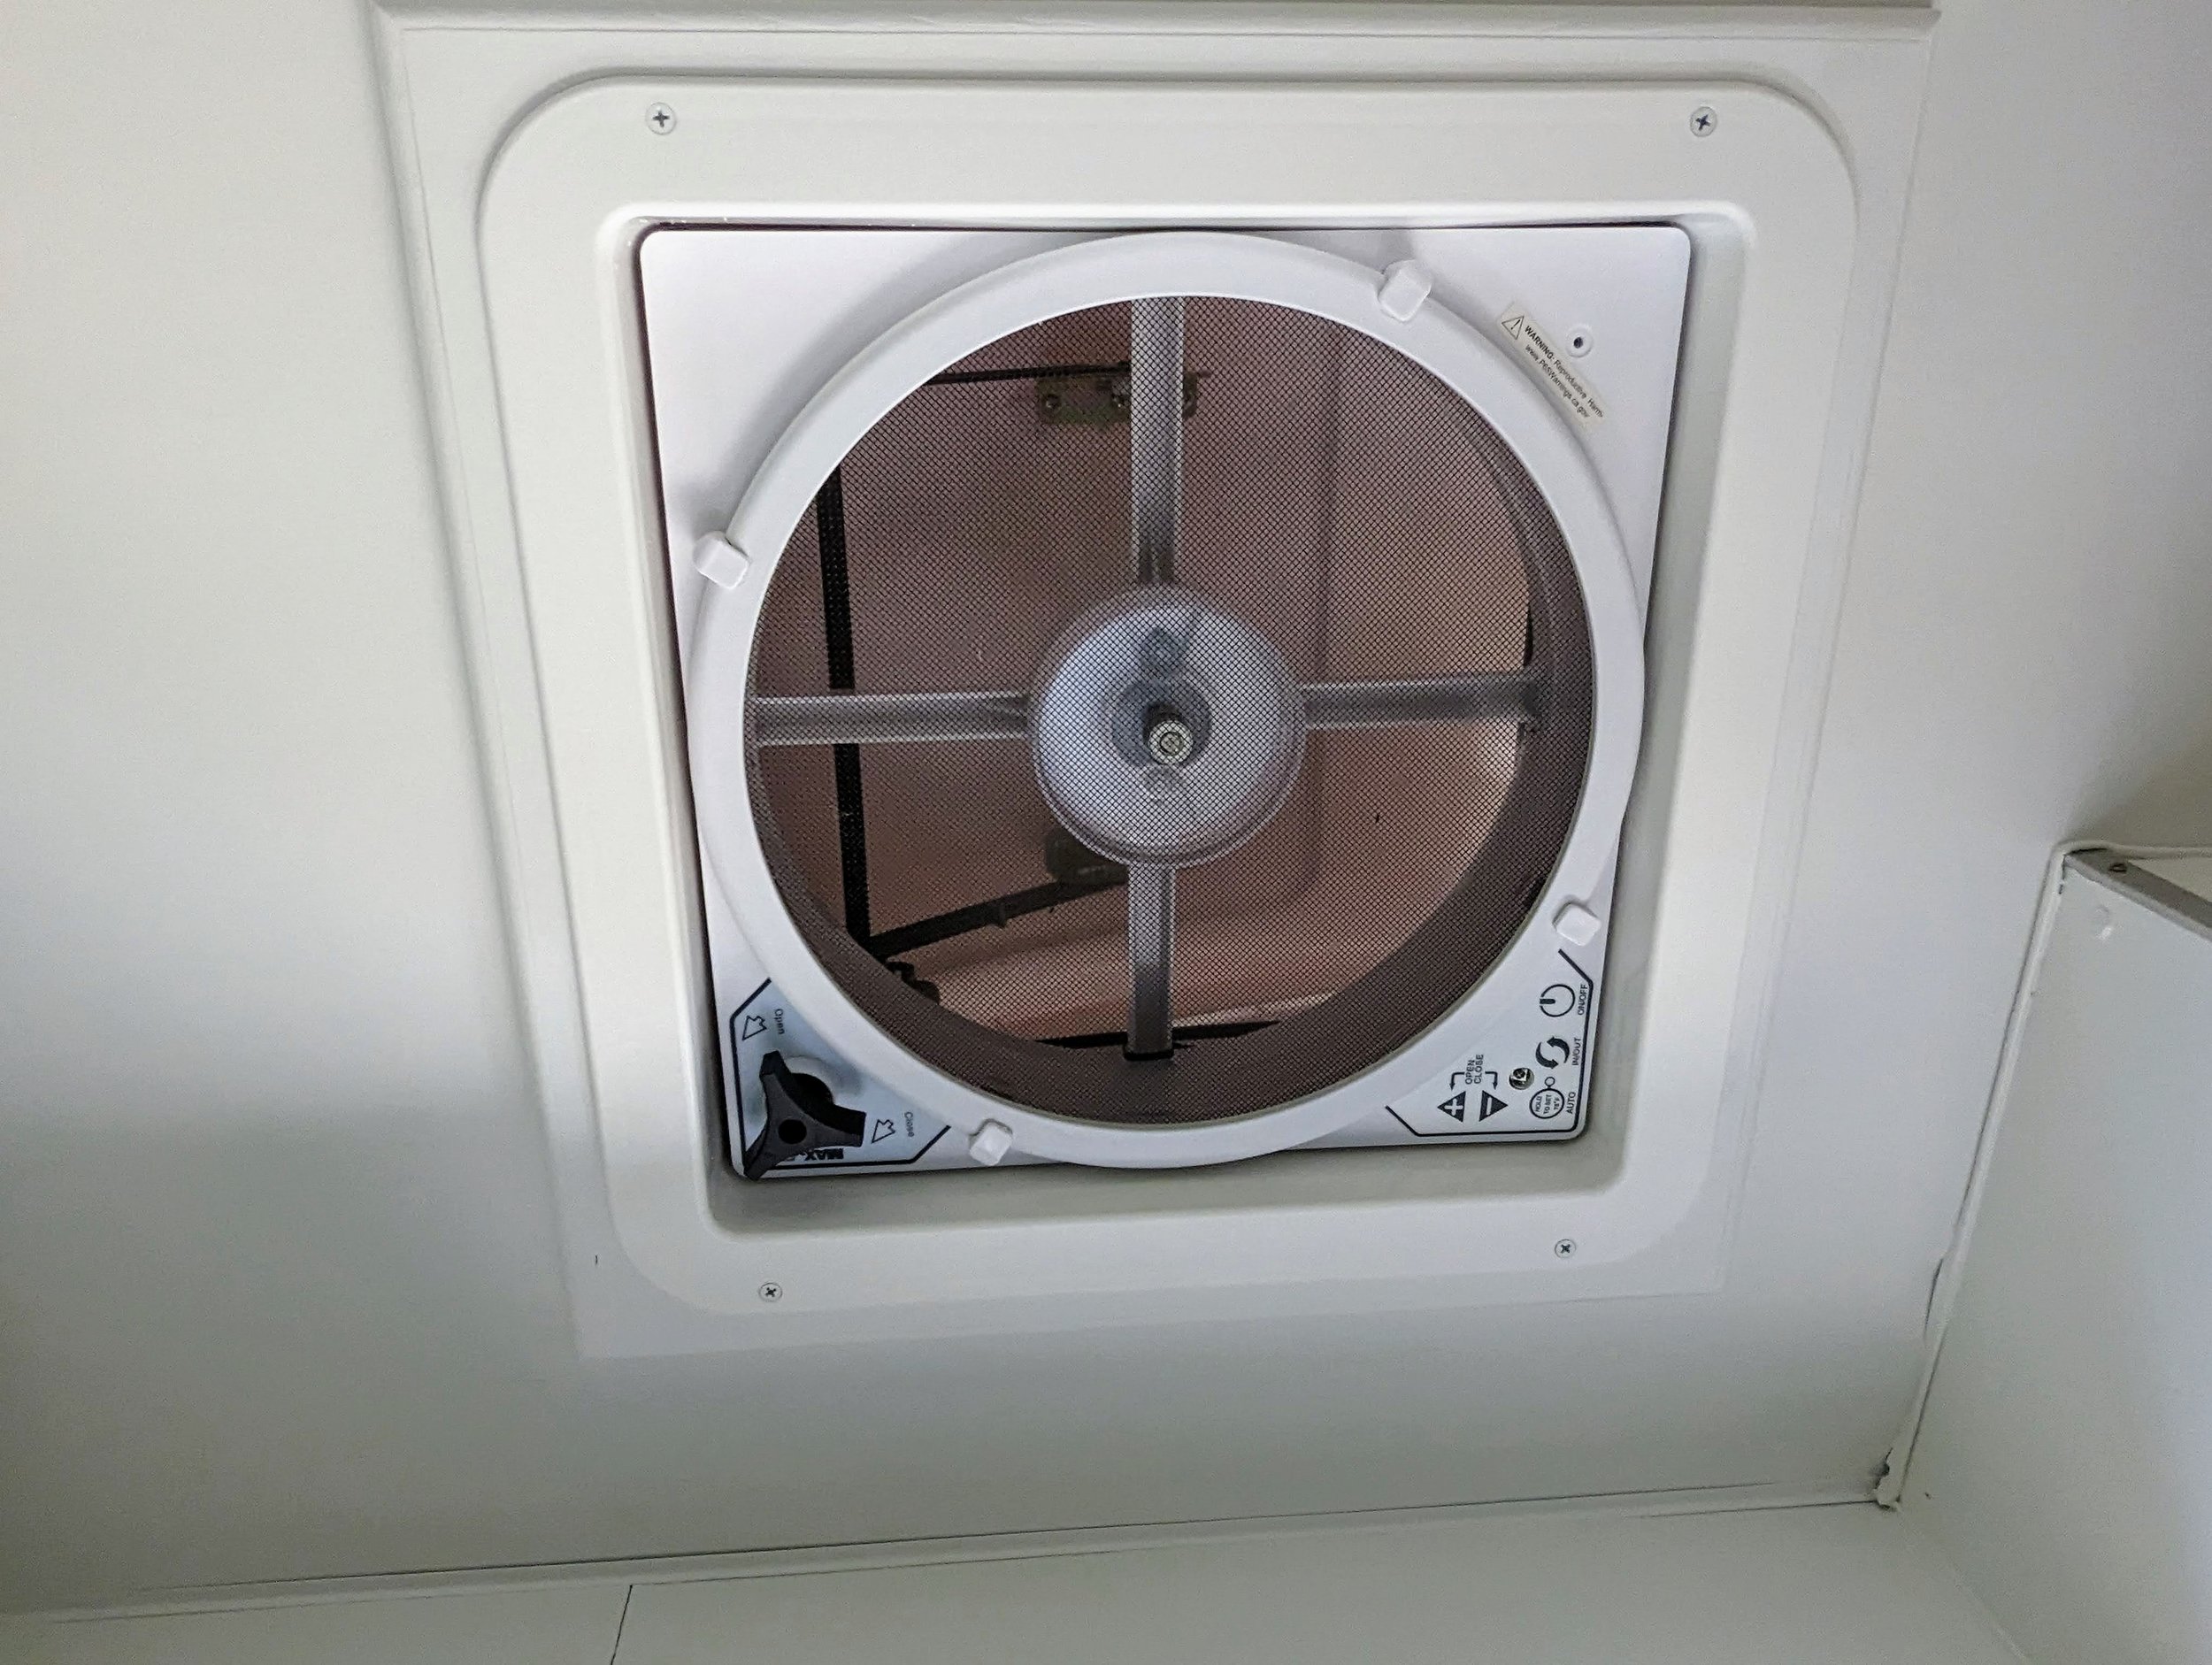
Added a 12V Maxxair Dome fan with LED lighting to the ceiling.
Added shelving underneath the refrigerator.
Applied stick on tile backsplash.
-
Replaced city water connection and fresh water gravity fill inlet.
Replaced all fresh water lines with PEX and braided hose connectors.
Added 12V water pump for sink usage without city water connection.
Replaced all grey water lines to allow for a deeper sink.
-
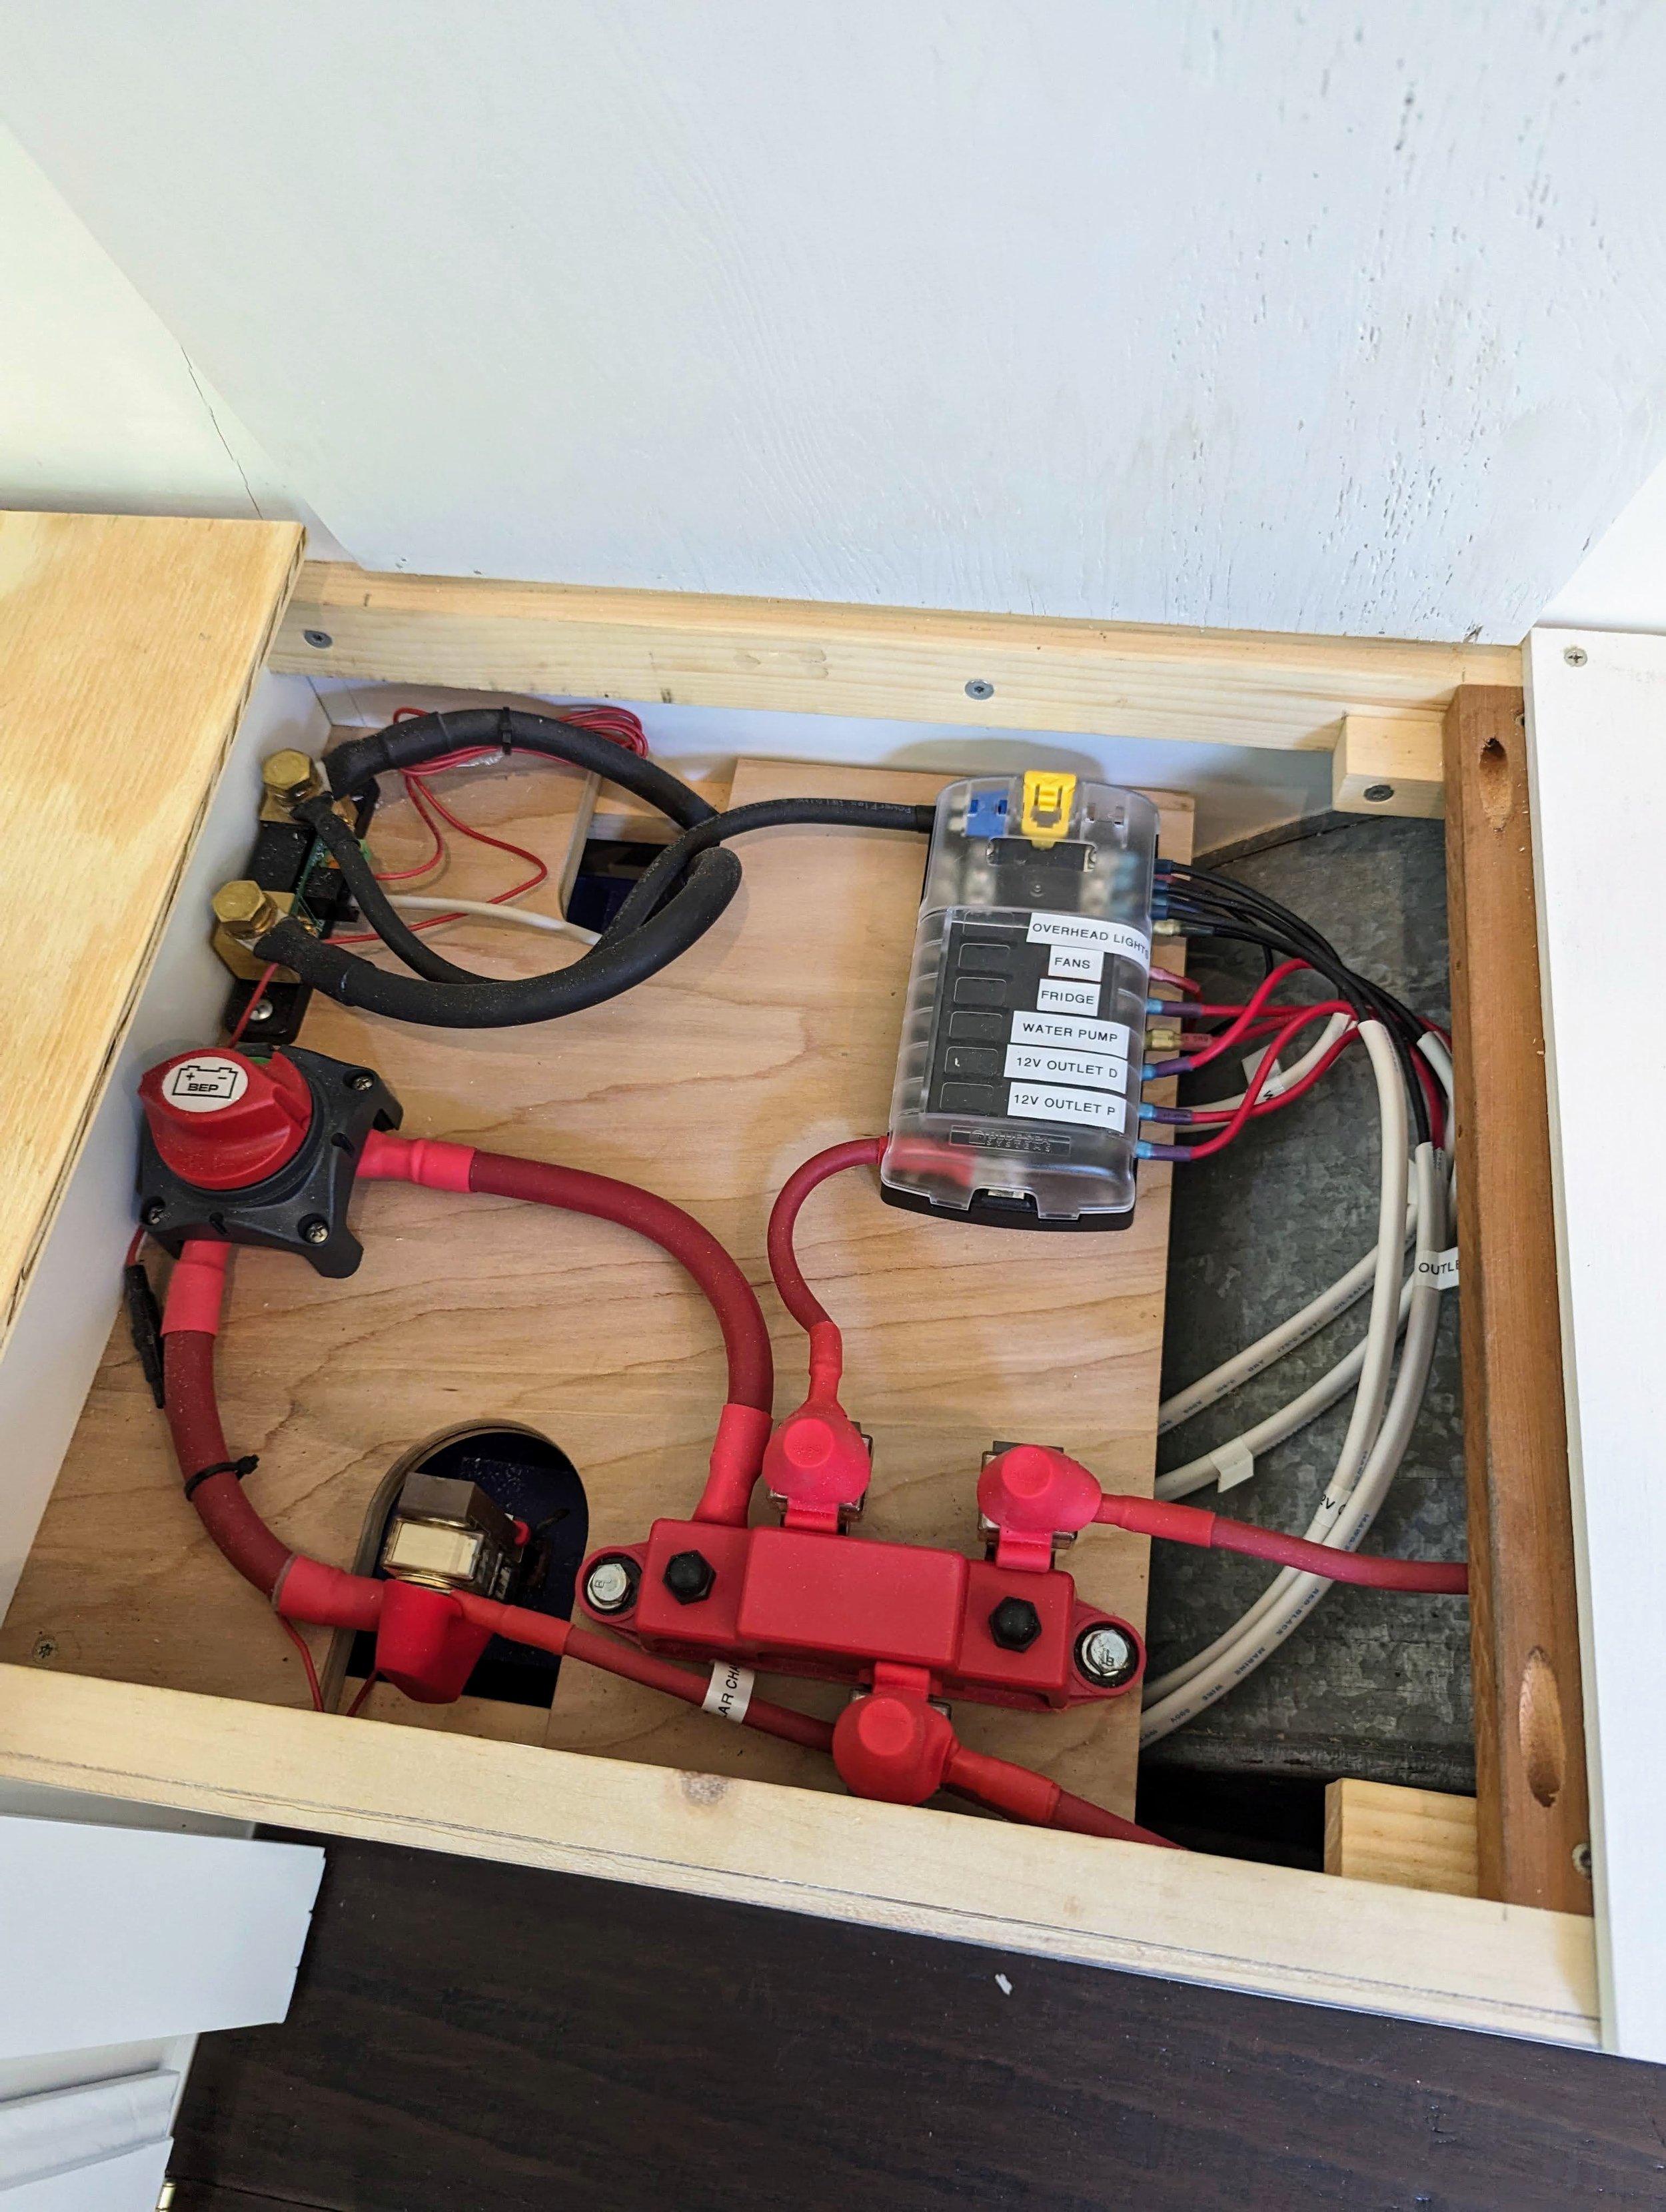
Upgraded from 15 amp to 30 amp service, including adding a second breaker to the breaker box.
New 120V AC outlet installed and old outlets and covers replaced.
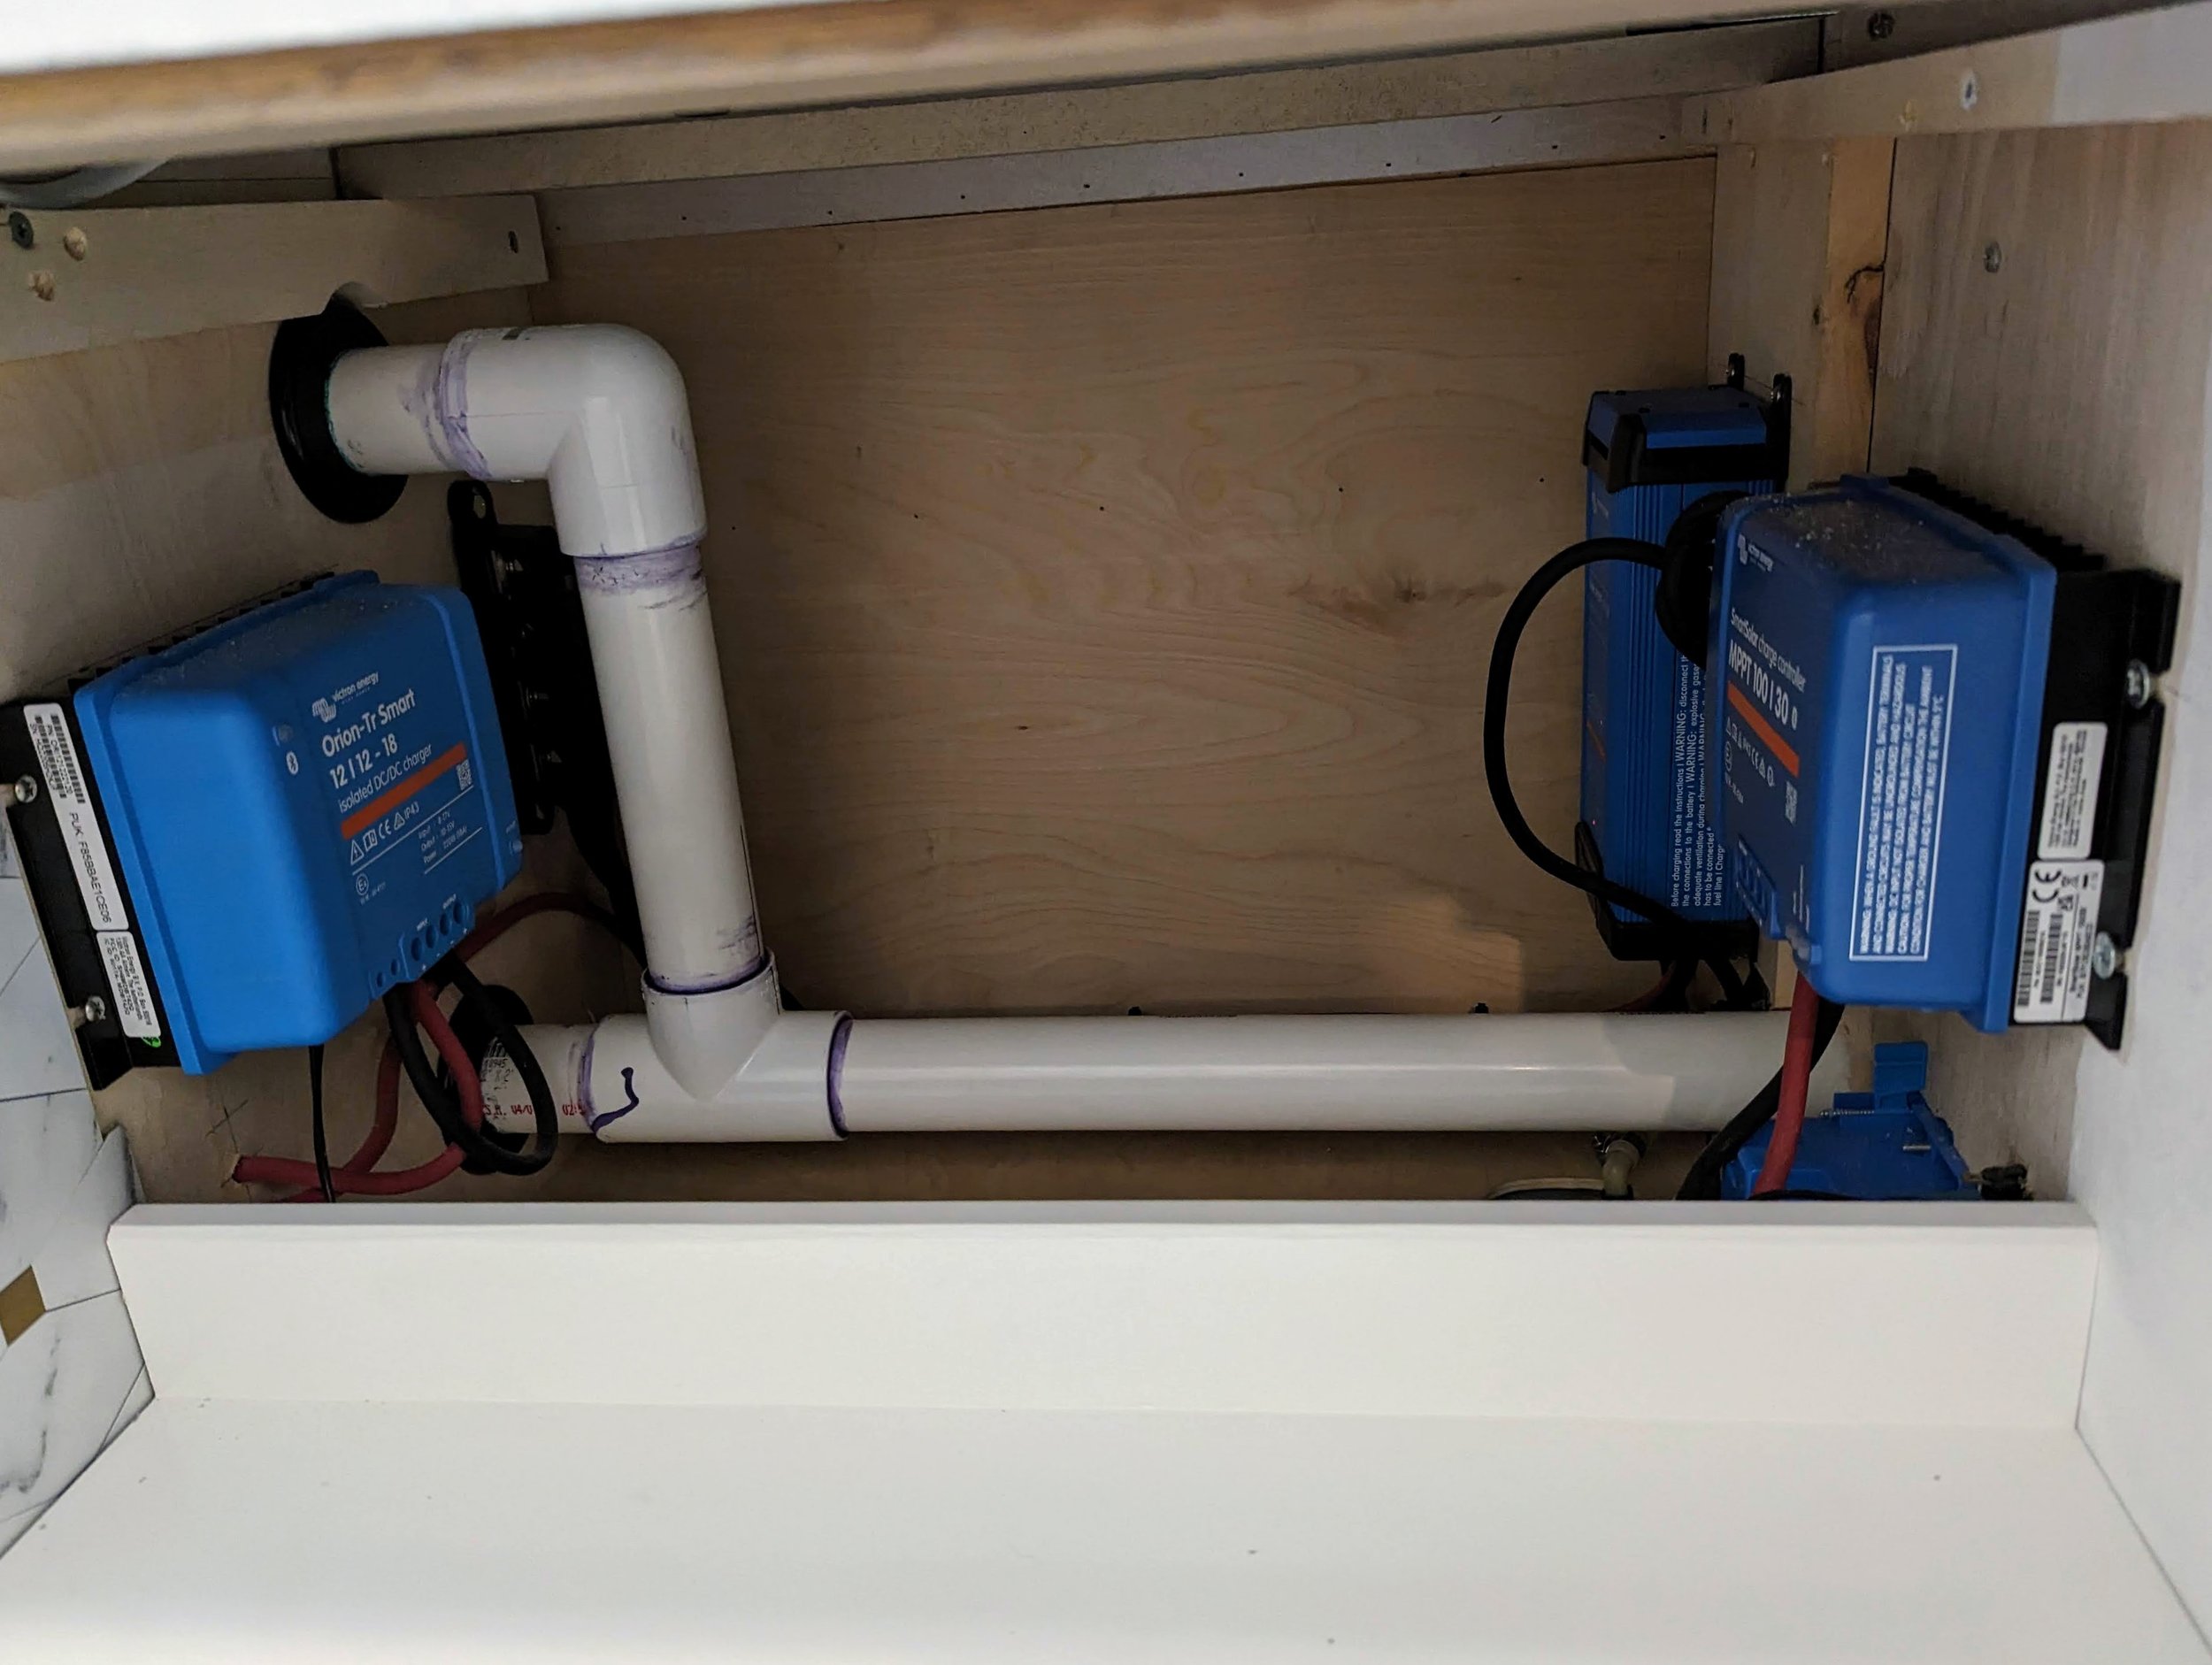
12V 100Ah Battle Born Lithium Iron Phosphate battery added.
Victron Energy 12V, 30 amp 120VAC battery charger with Bluetooth.
Victron Energy 18 amp DC-DC battery charger with Bluetooth for alternator charging.
Anderson connectors added to trailer and vehicle for high charge capability.
Victron Energy 100V 30 amp 12/24V MPPT solar charge controller with Bluetooth.
Heavy duty on/off battery switch.
Victron Energy BMV 712 battery monitor with Bluetooth.
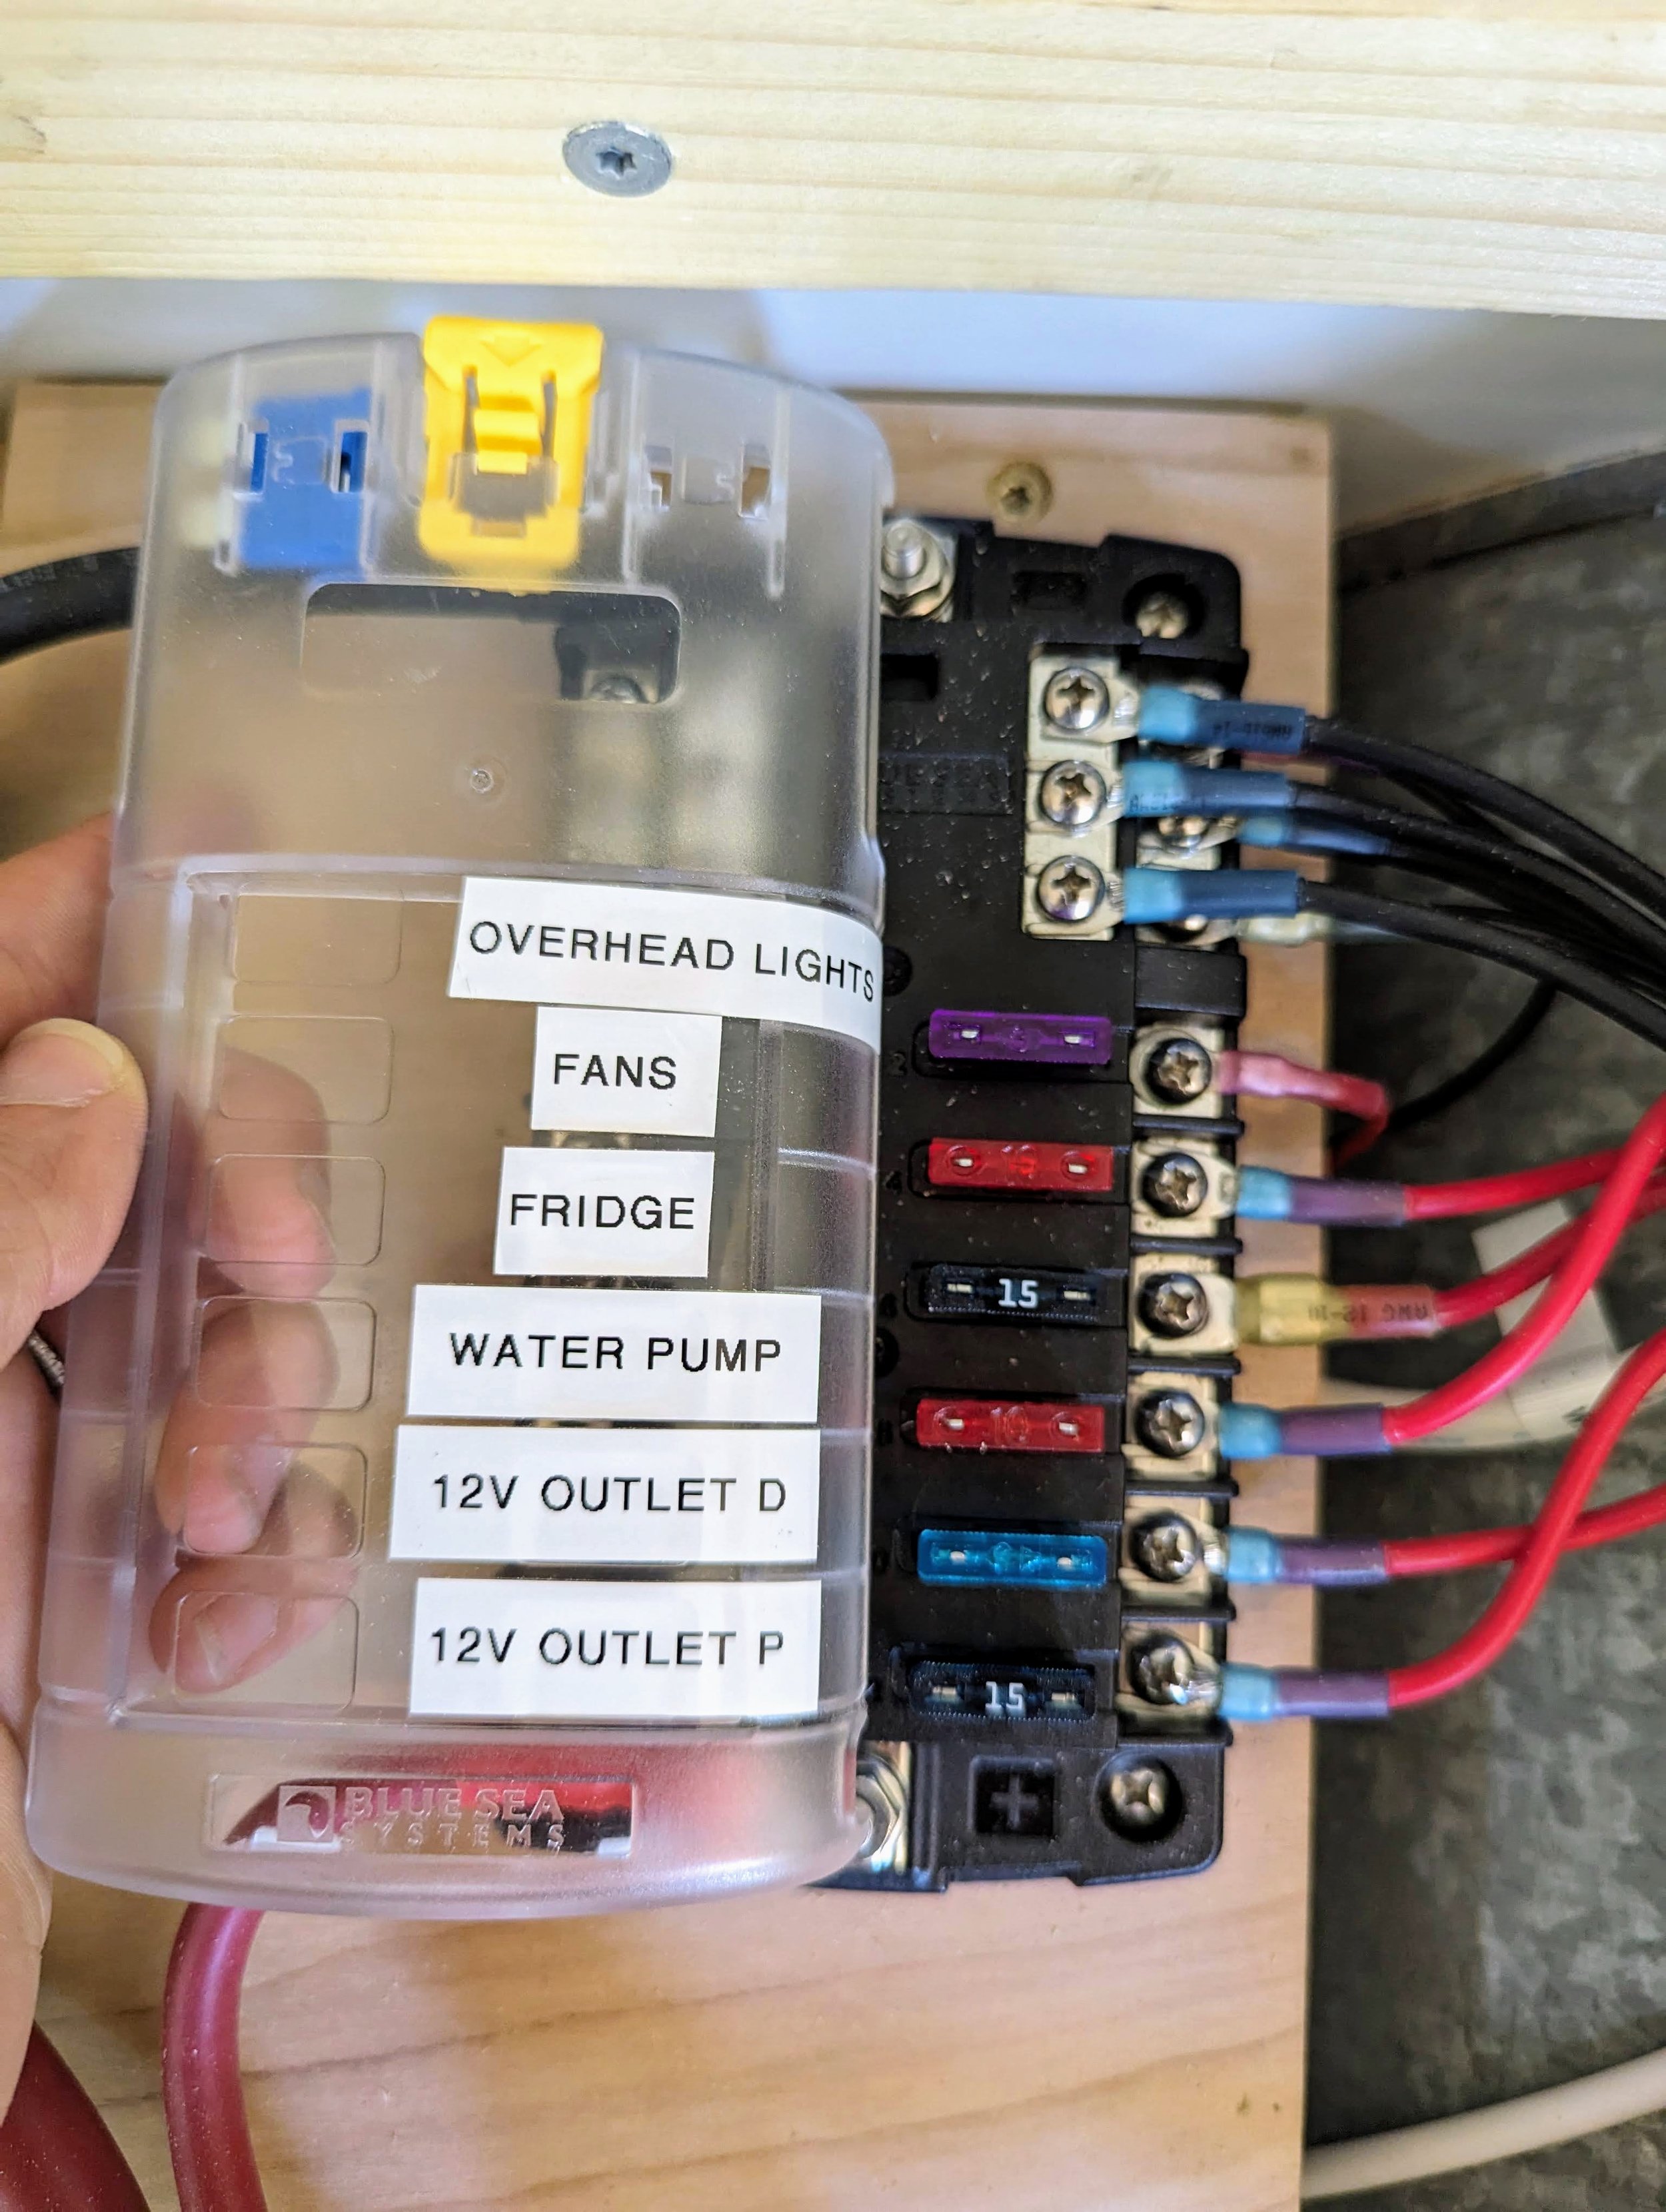
Fuse box for 12V components.
Four 12V and USB outlets added.
Interior lighting upgraded to 12 V dimmable LEDs throughout.
Replaced burned out exterior lights.
-
Replaced existing ceiling vent with Maxxair Maxxfan with integrated rain shield.
Added Maxxair Dome fan to bathroom.
-
12V, dimmable, LED puck lights installed in the ceiling.
Painted interior walls and cabinetry.
Installed bamboo hardwood flooring.
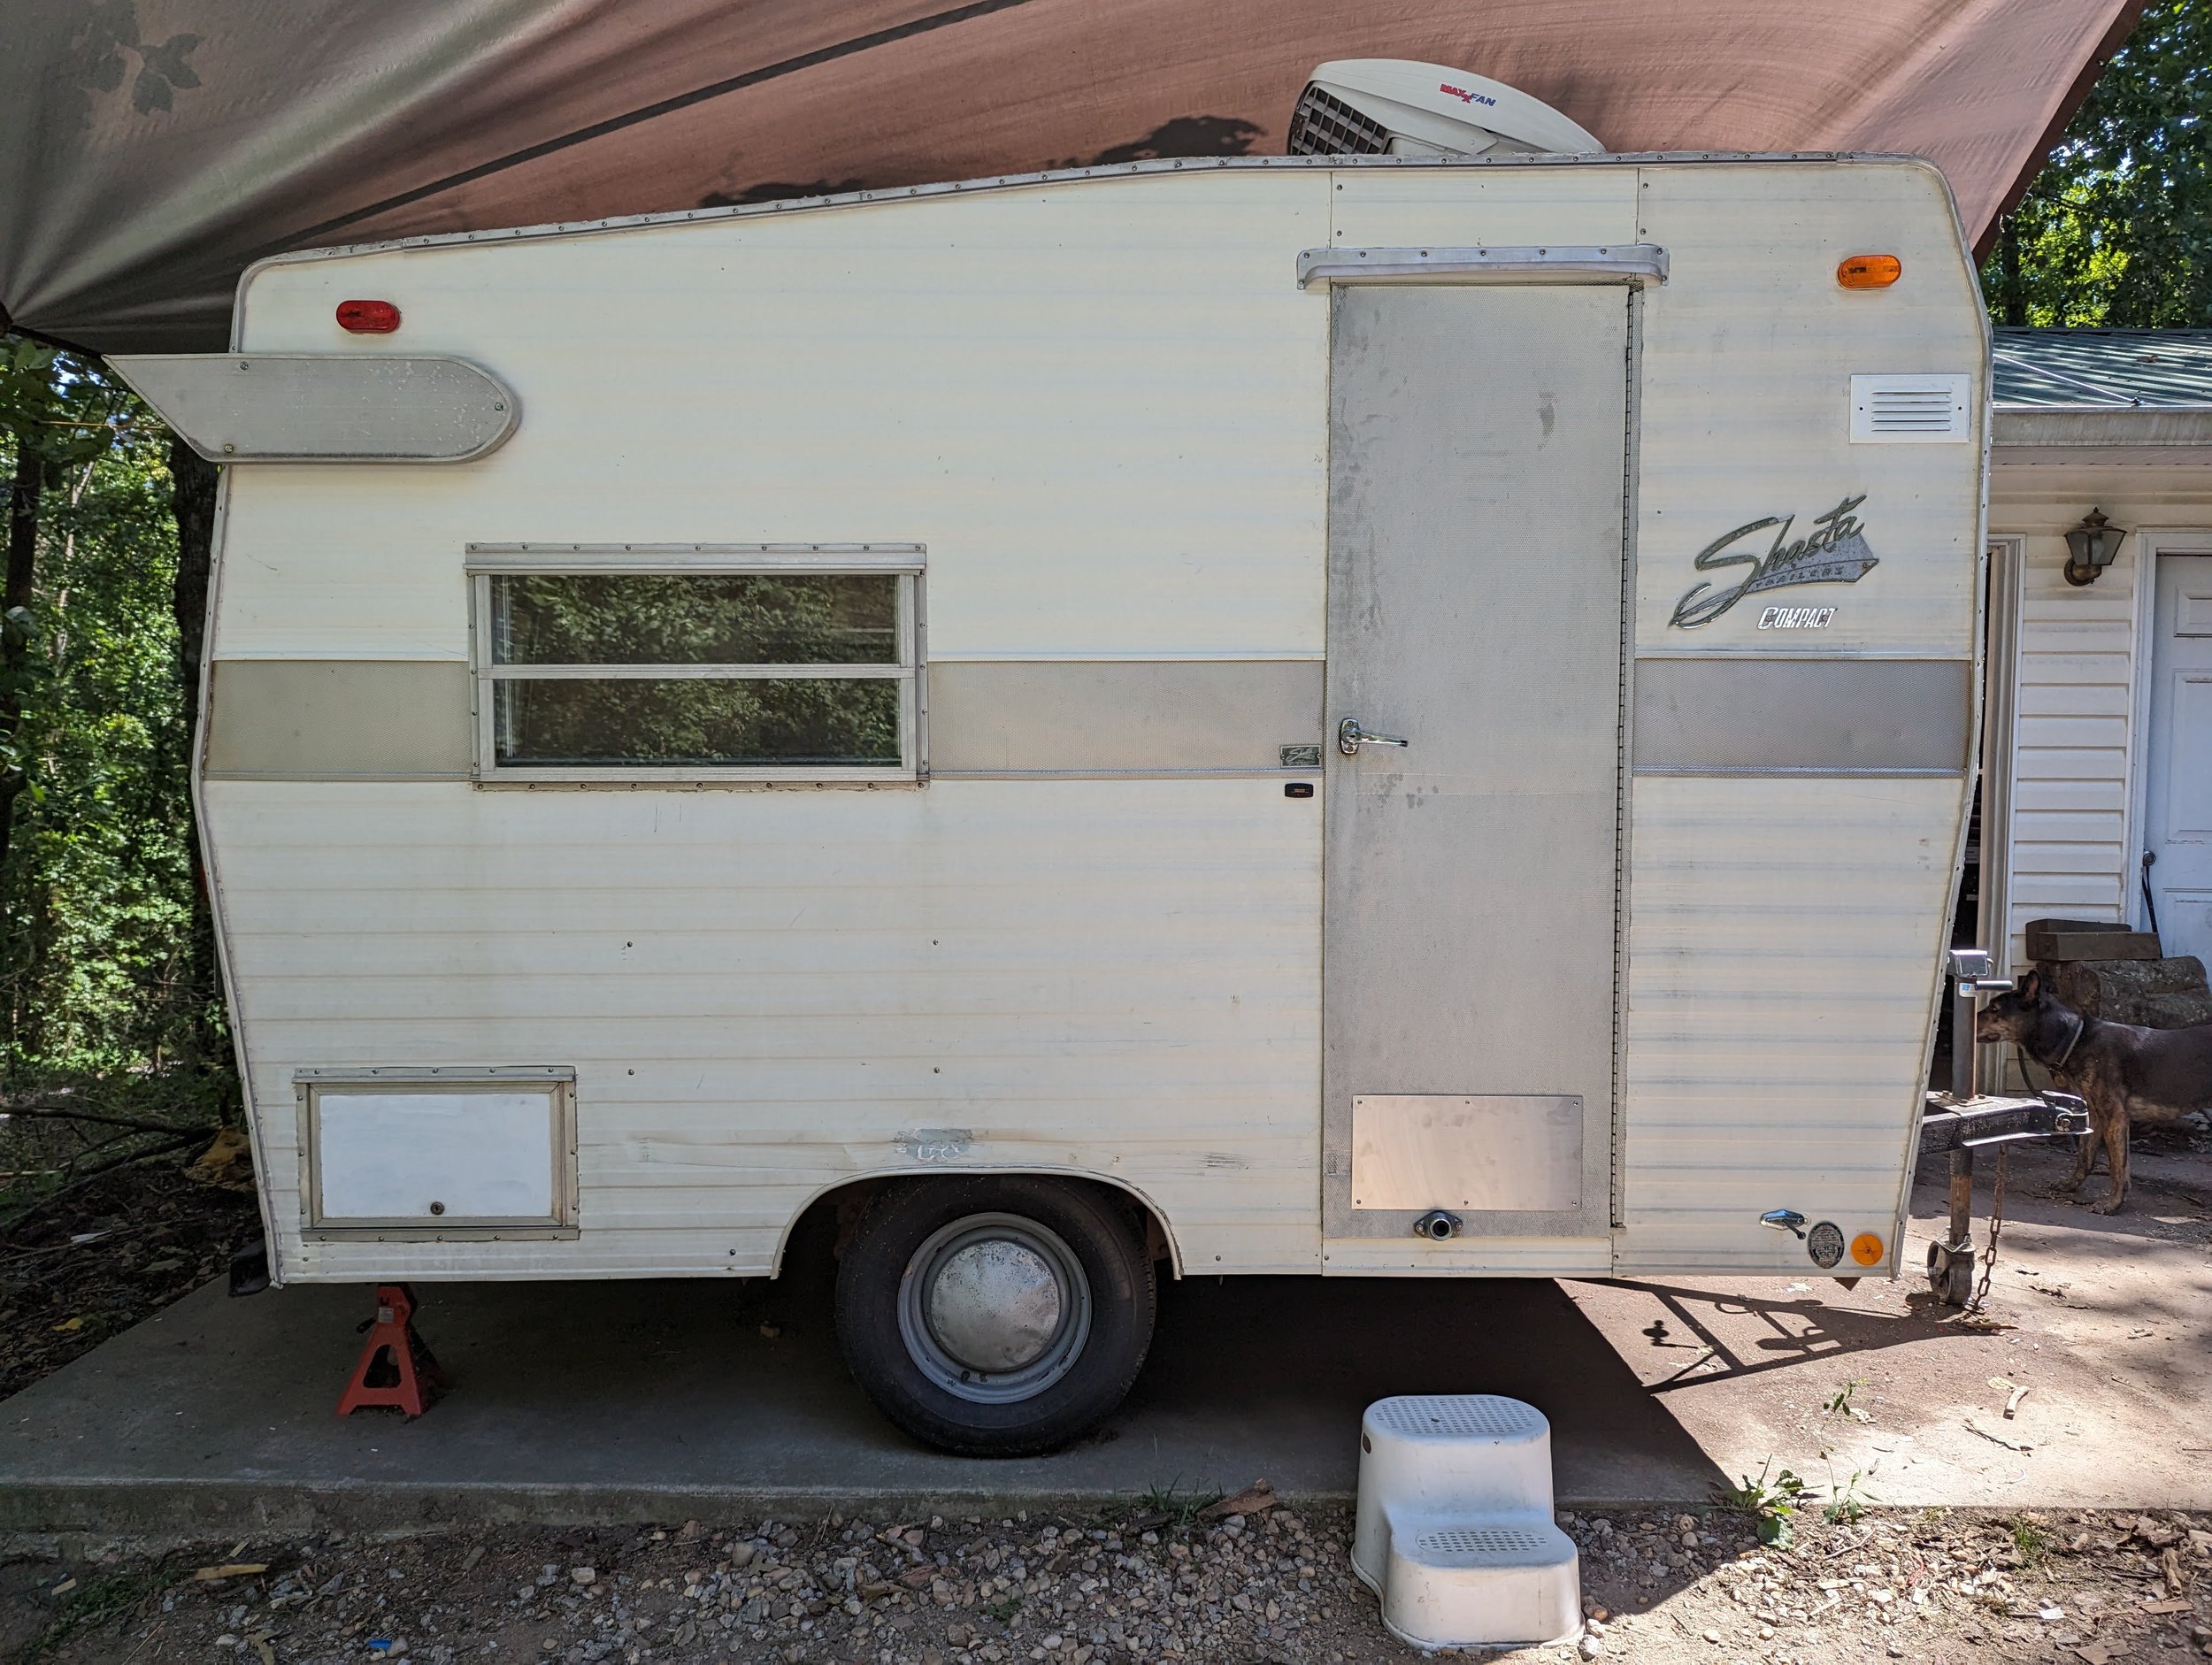
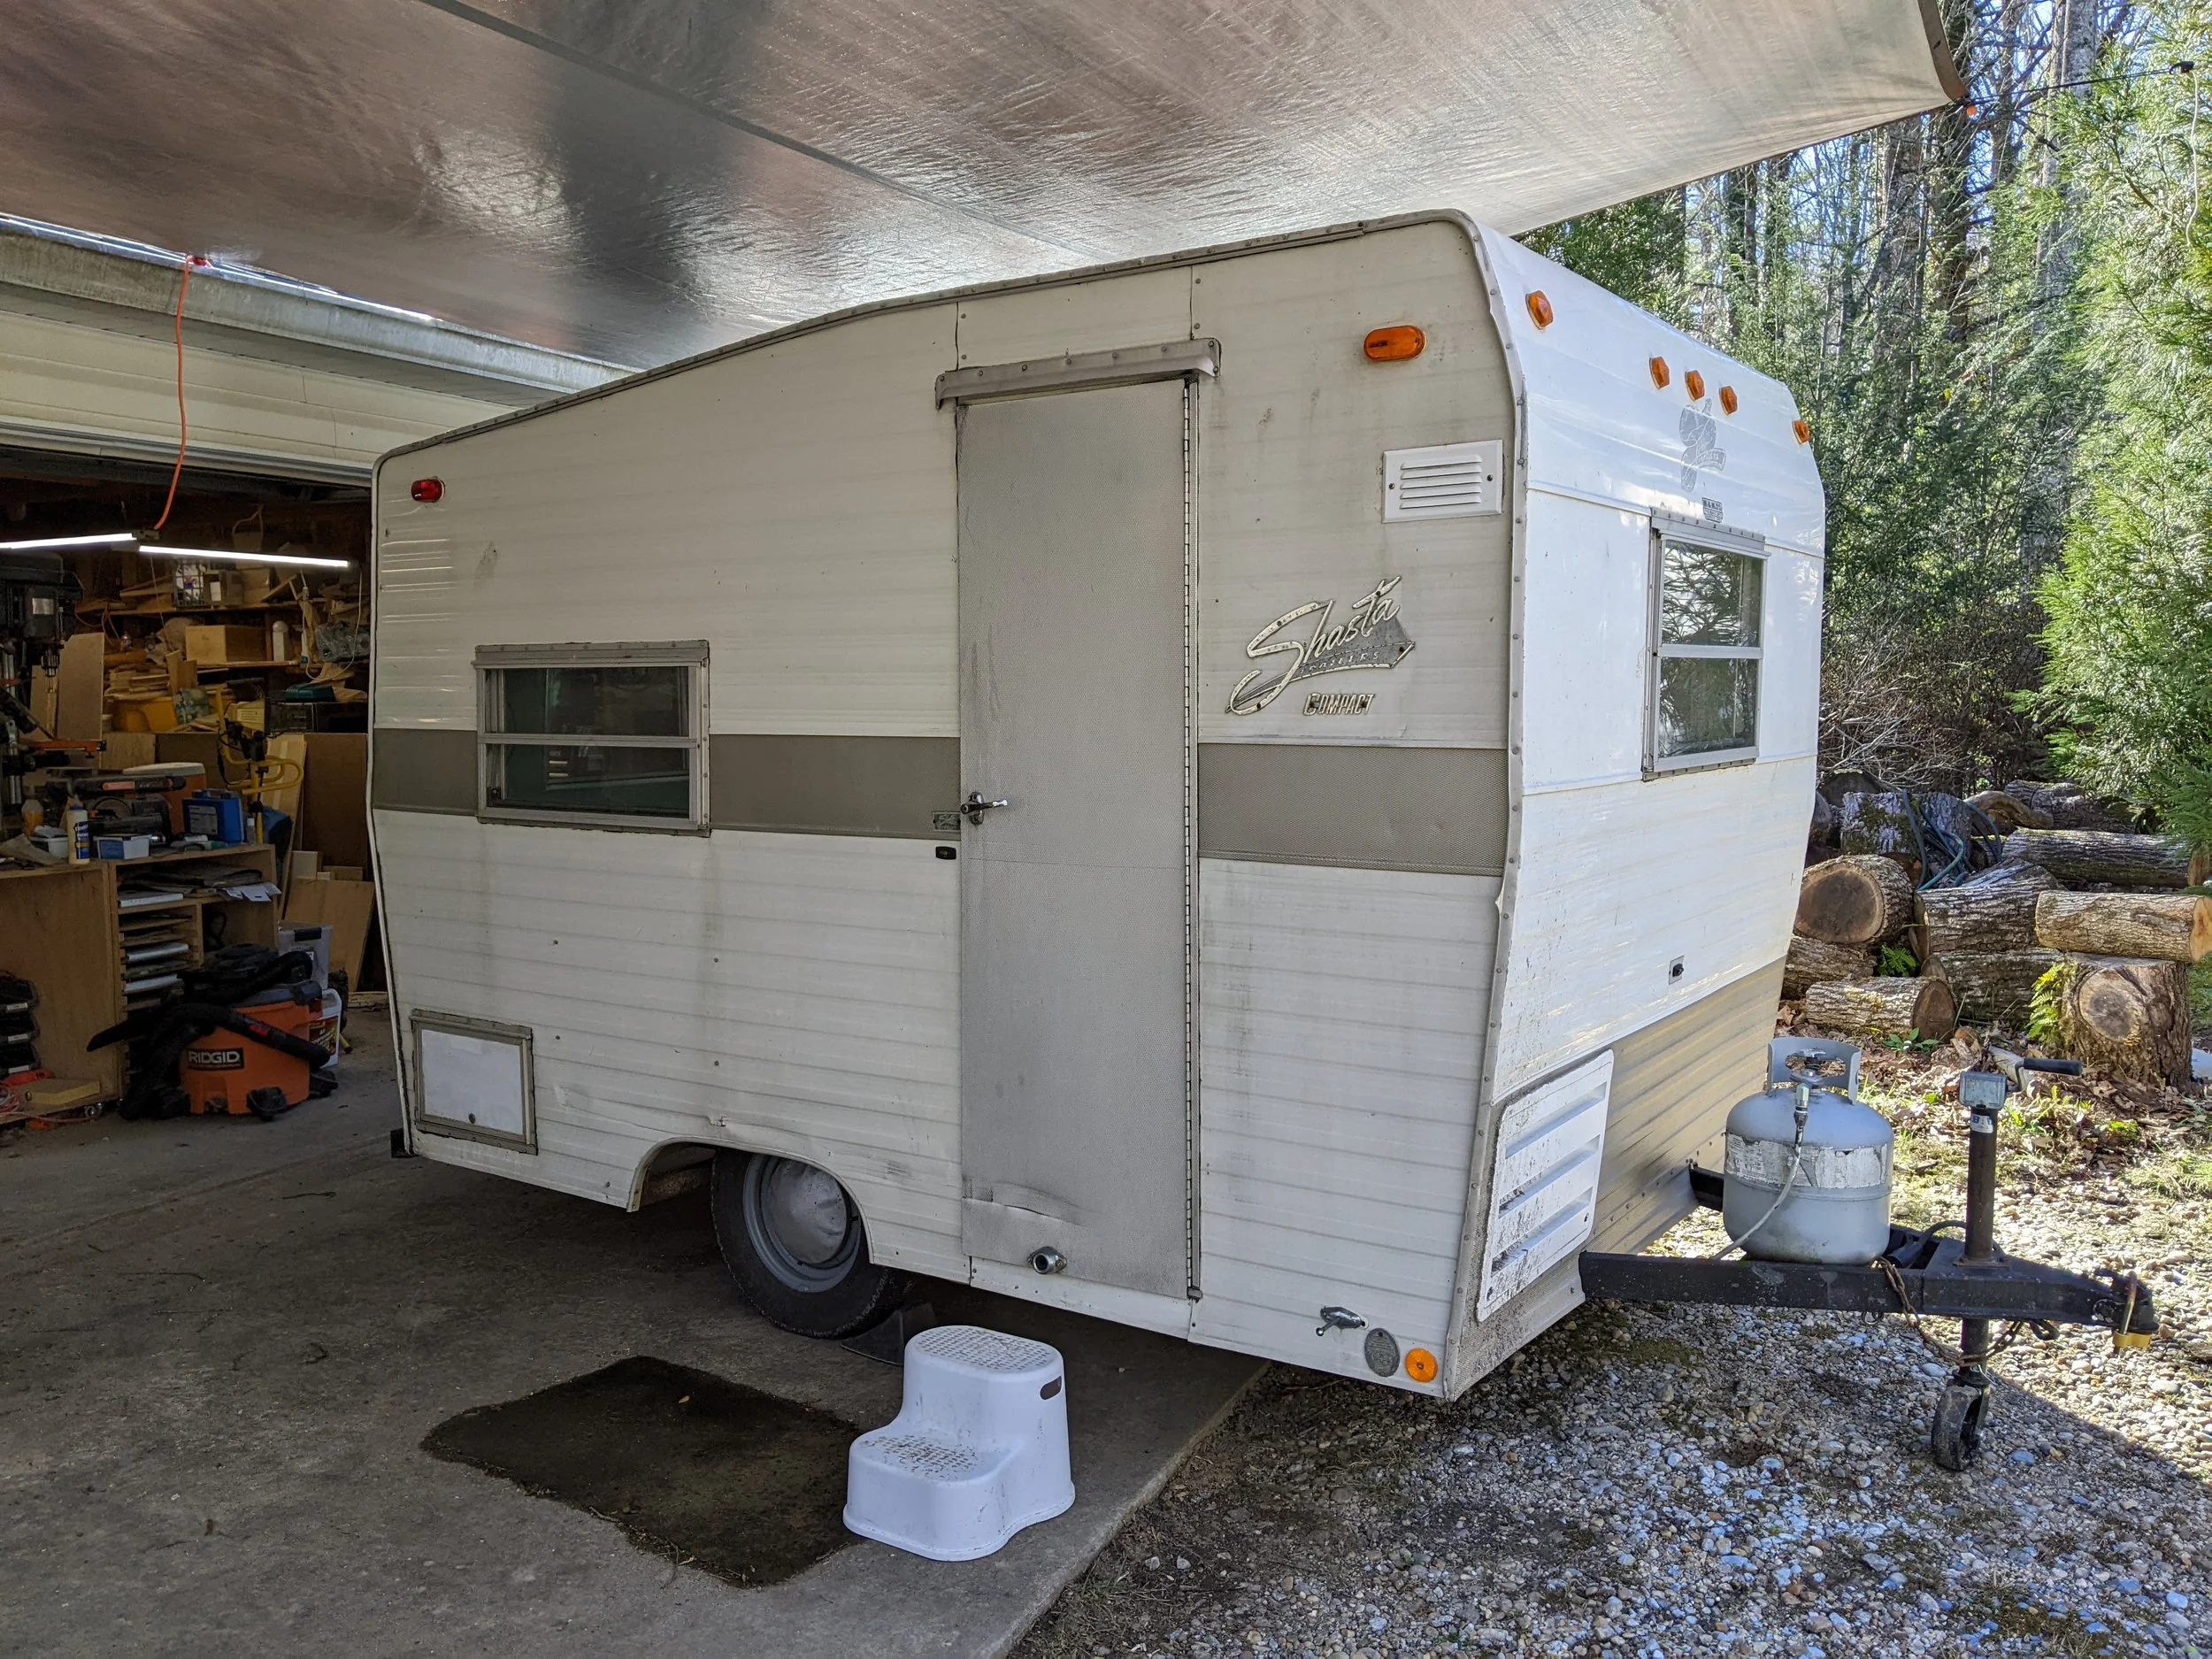
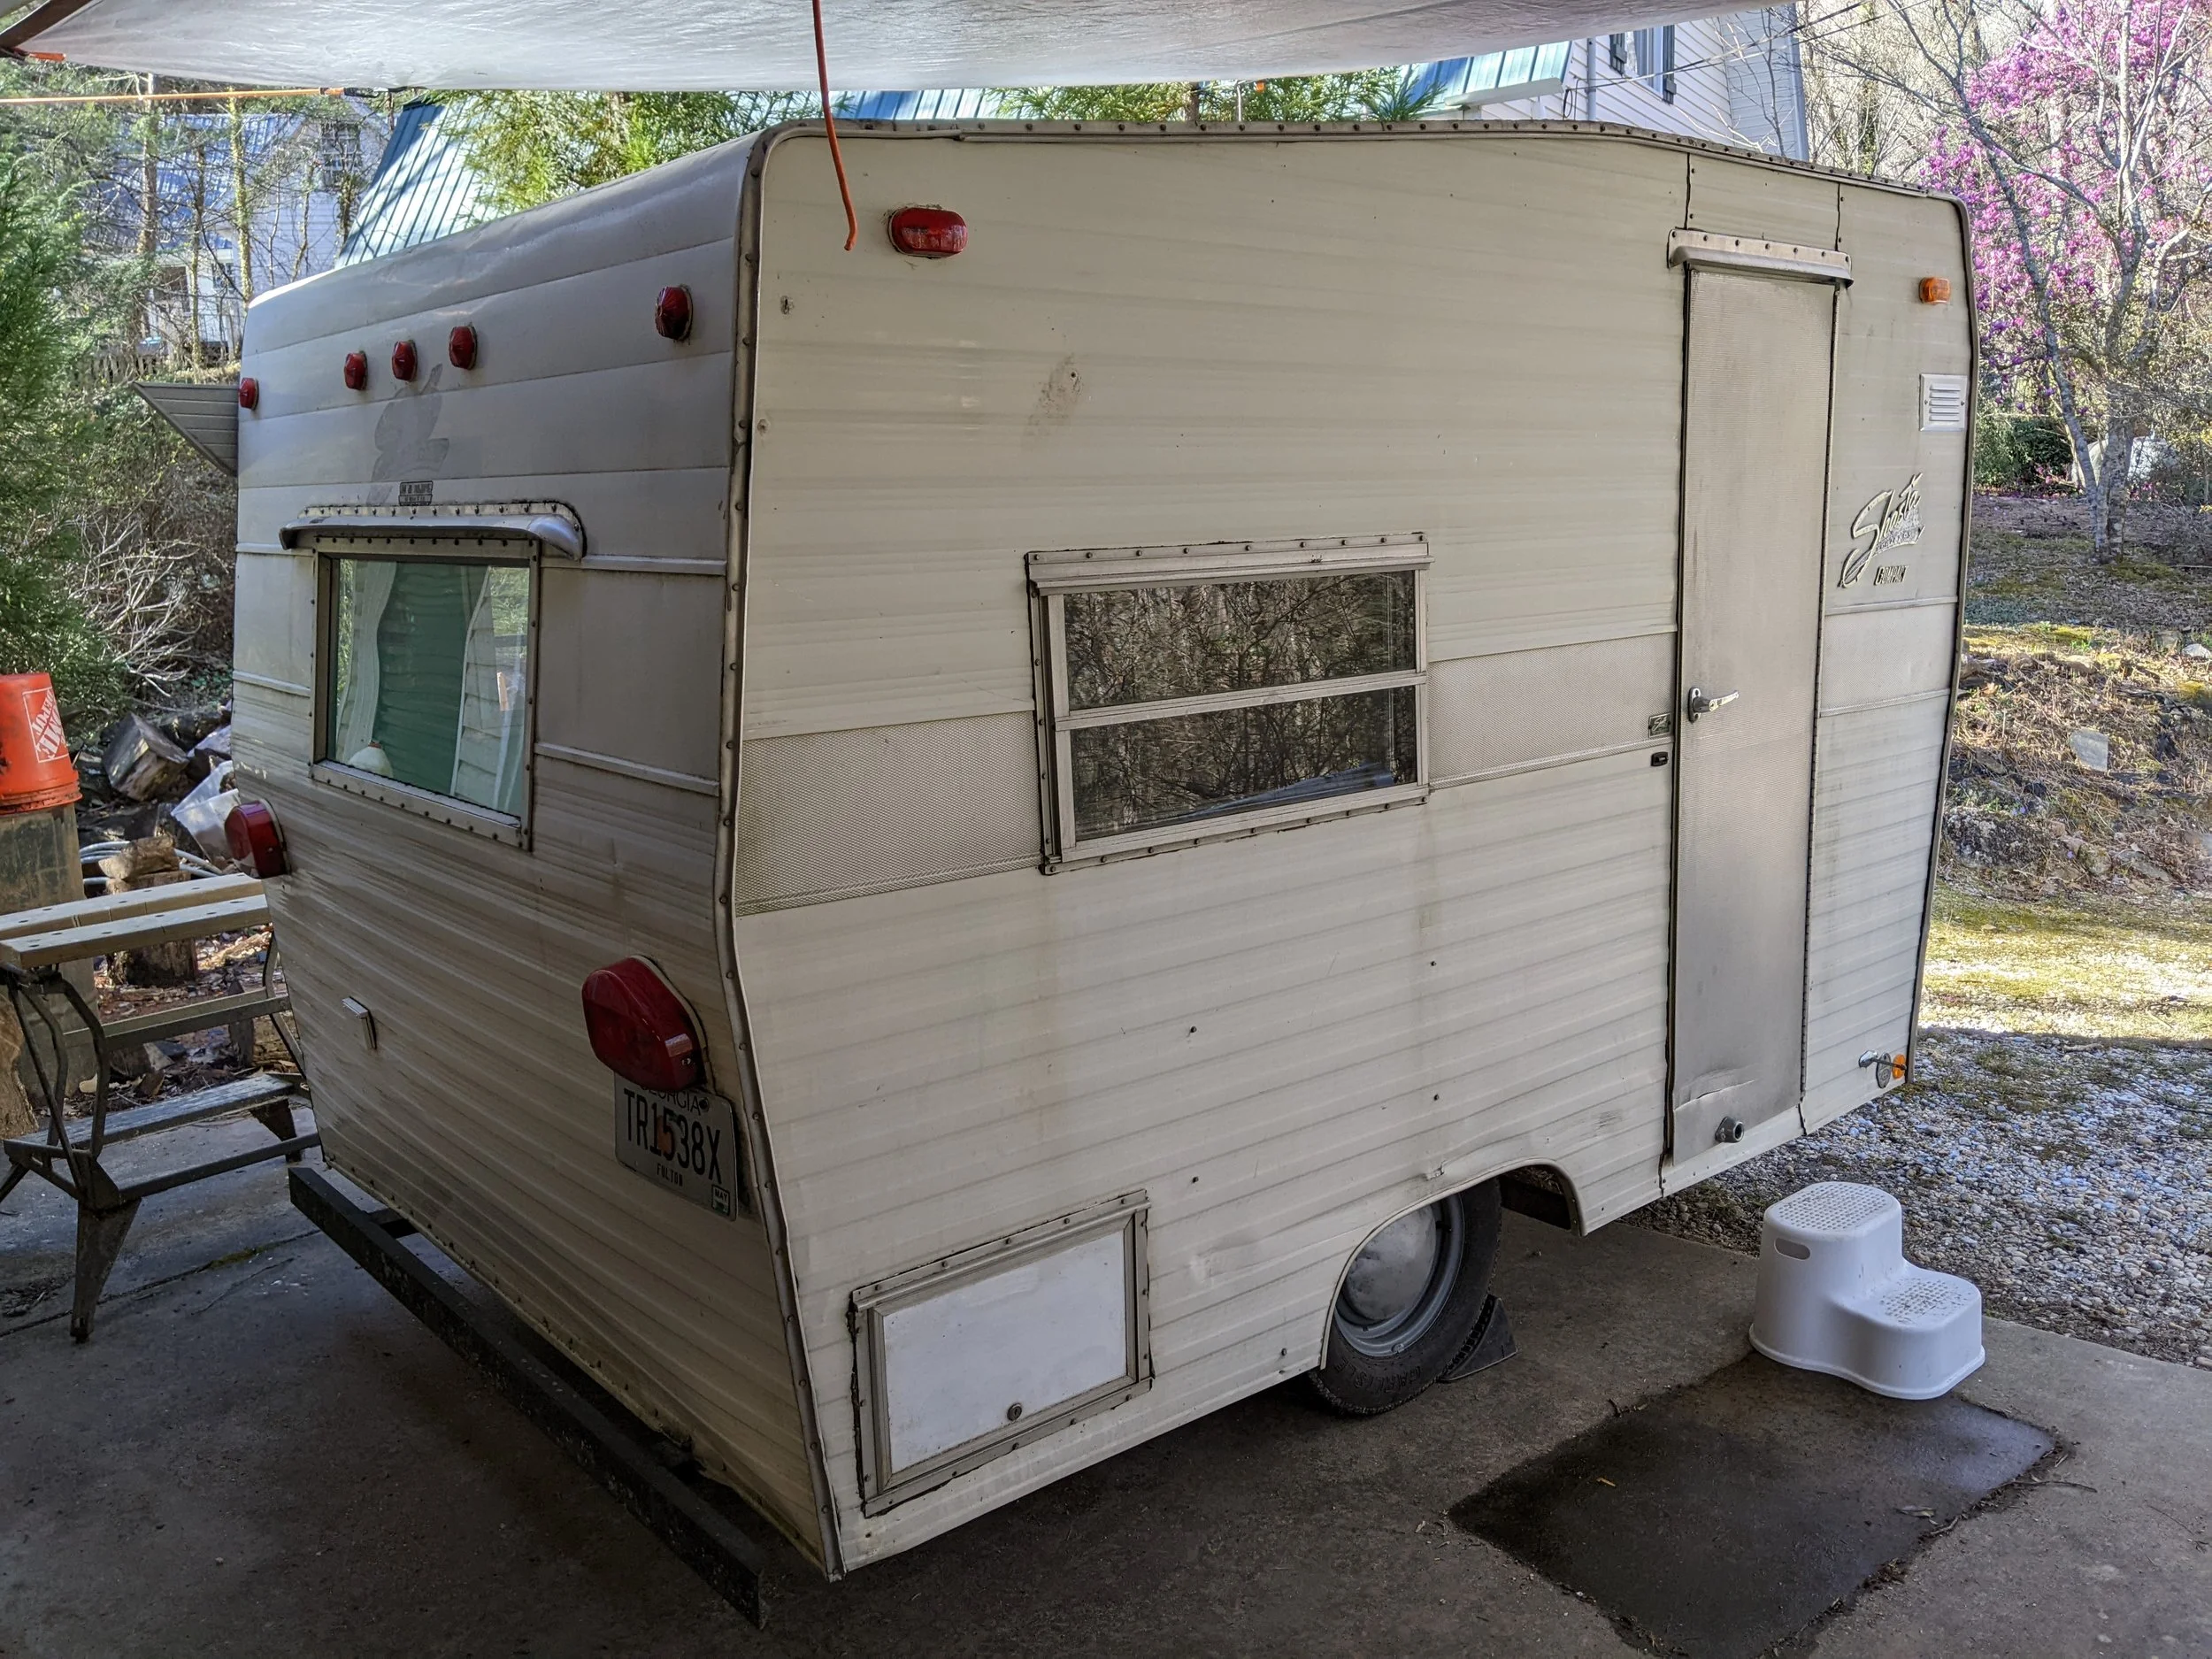
Before
The gallery below shows the state of the trailer when we received it from our clients.


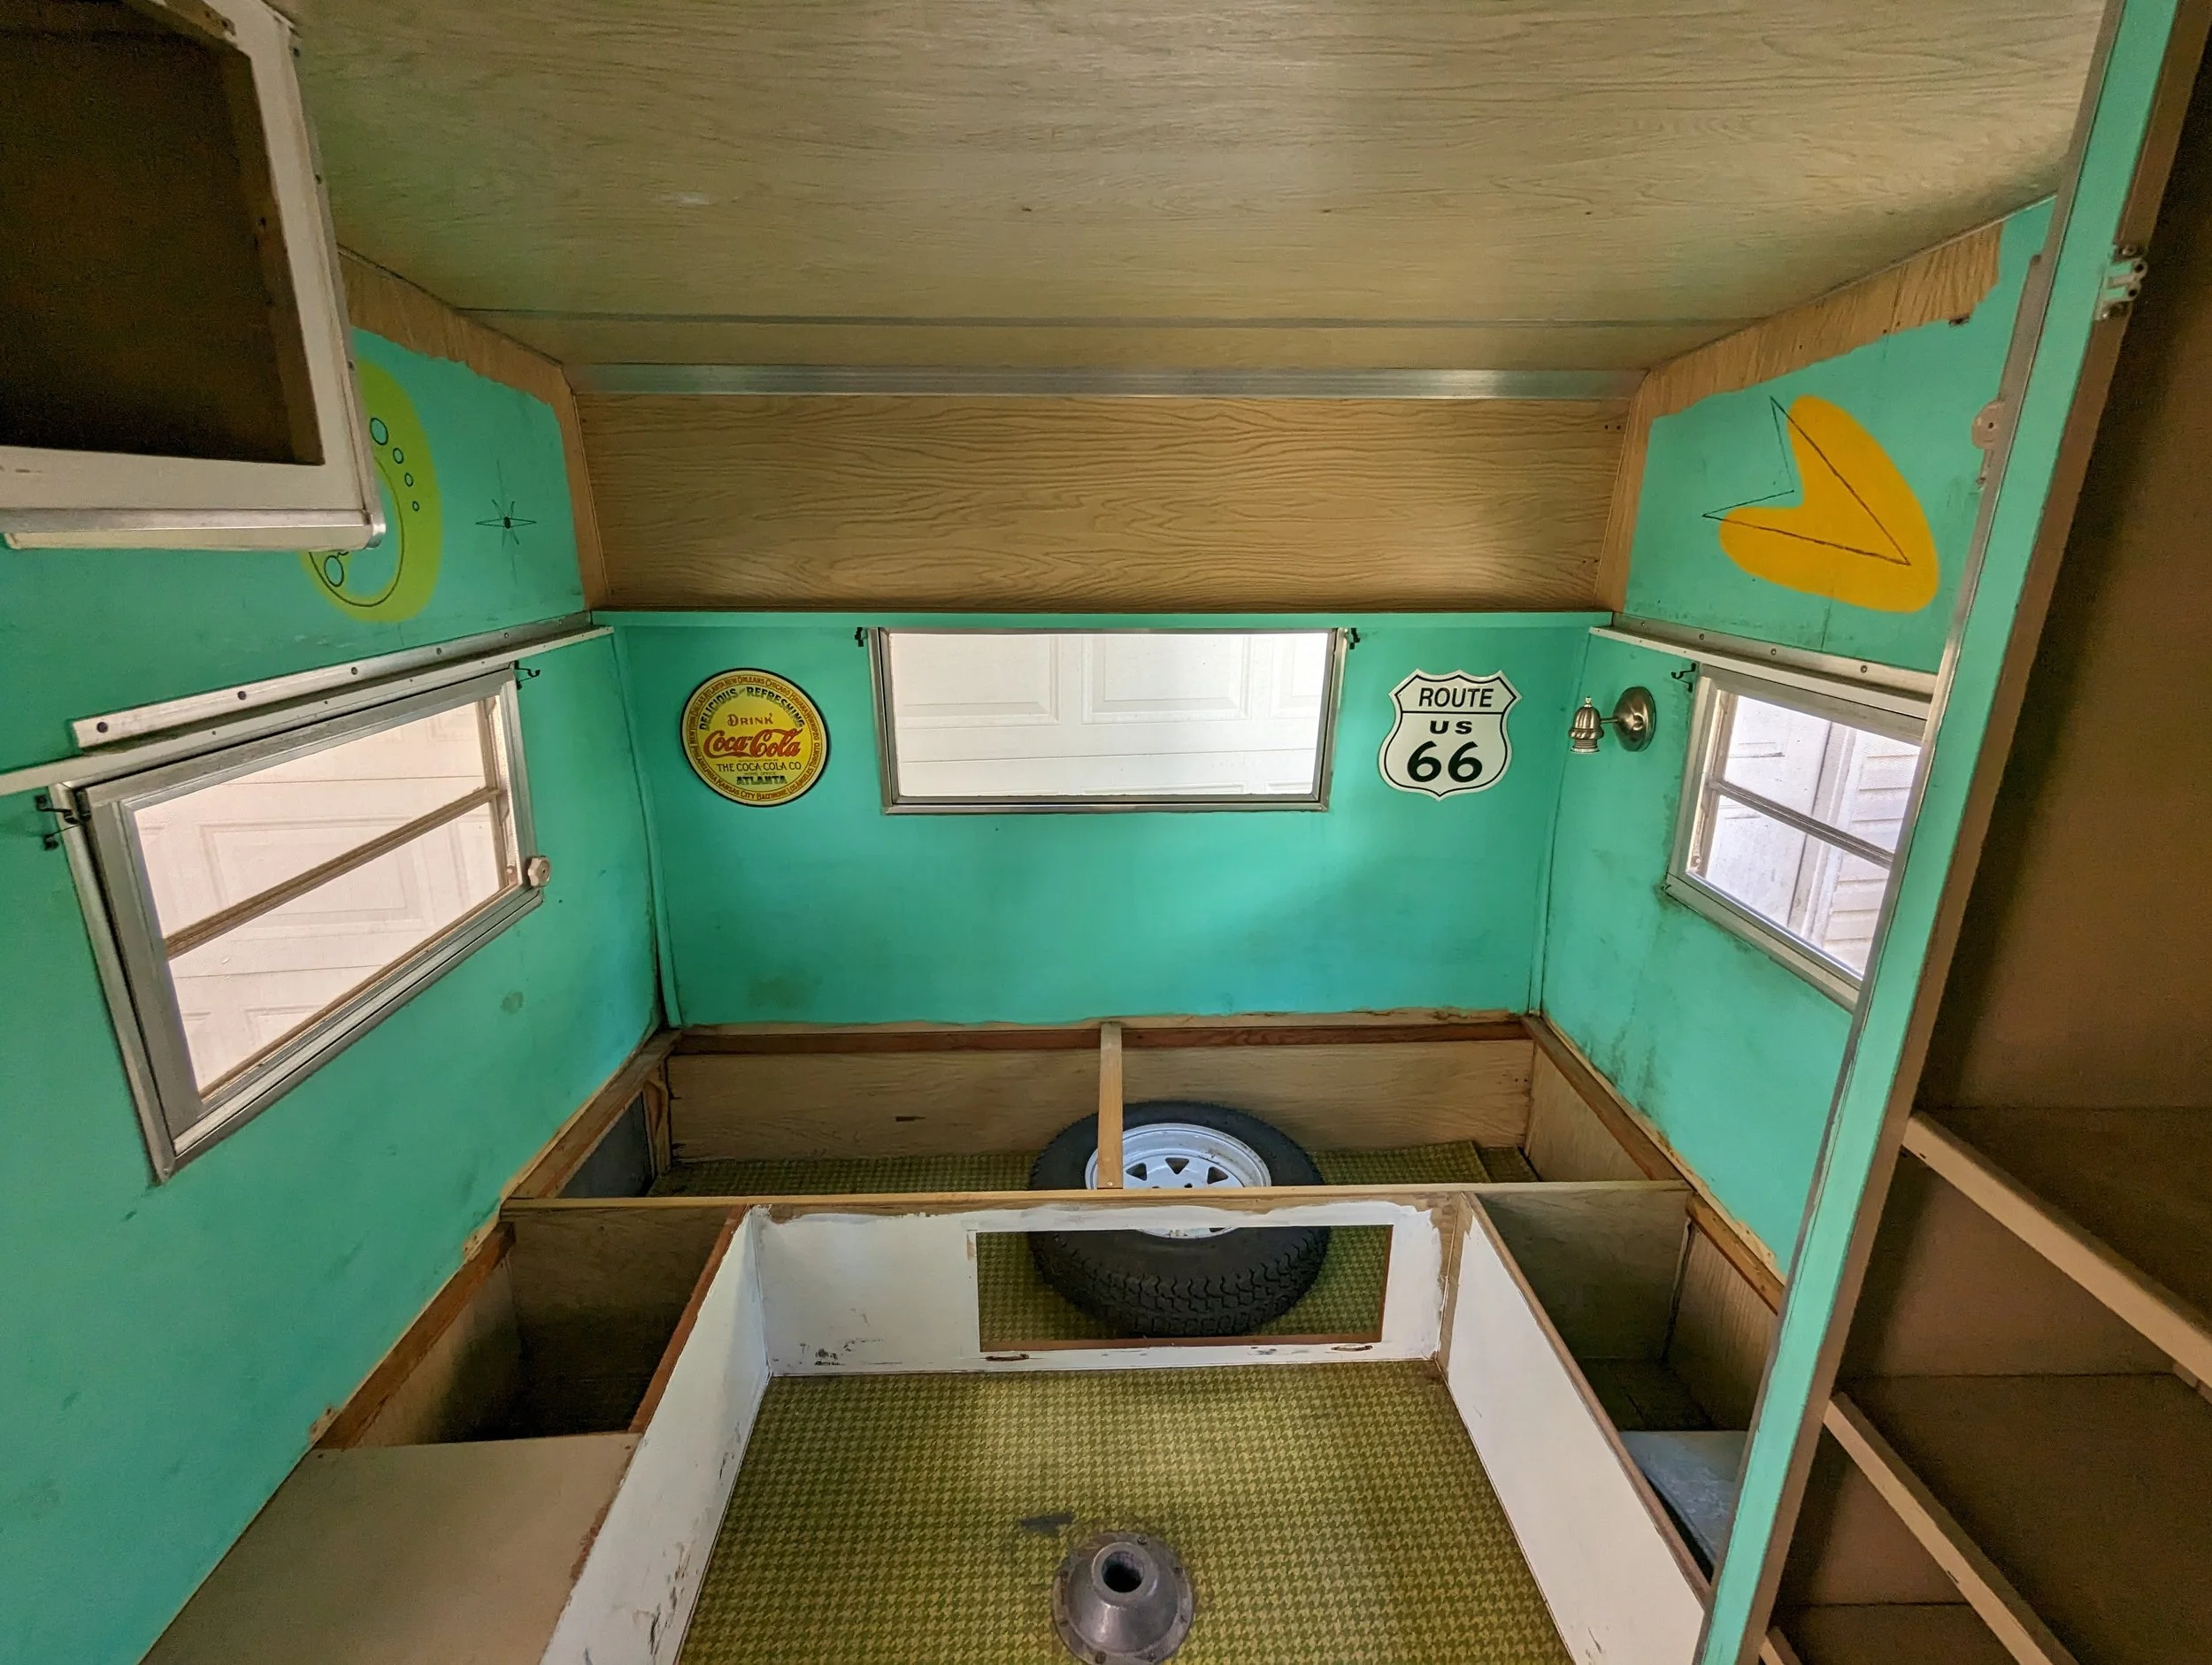
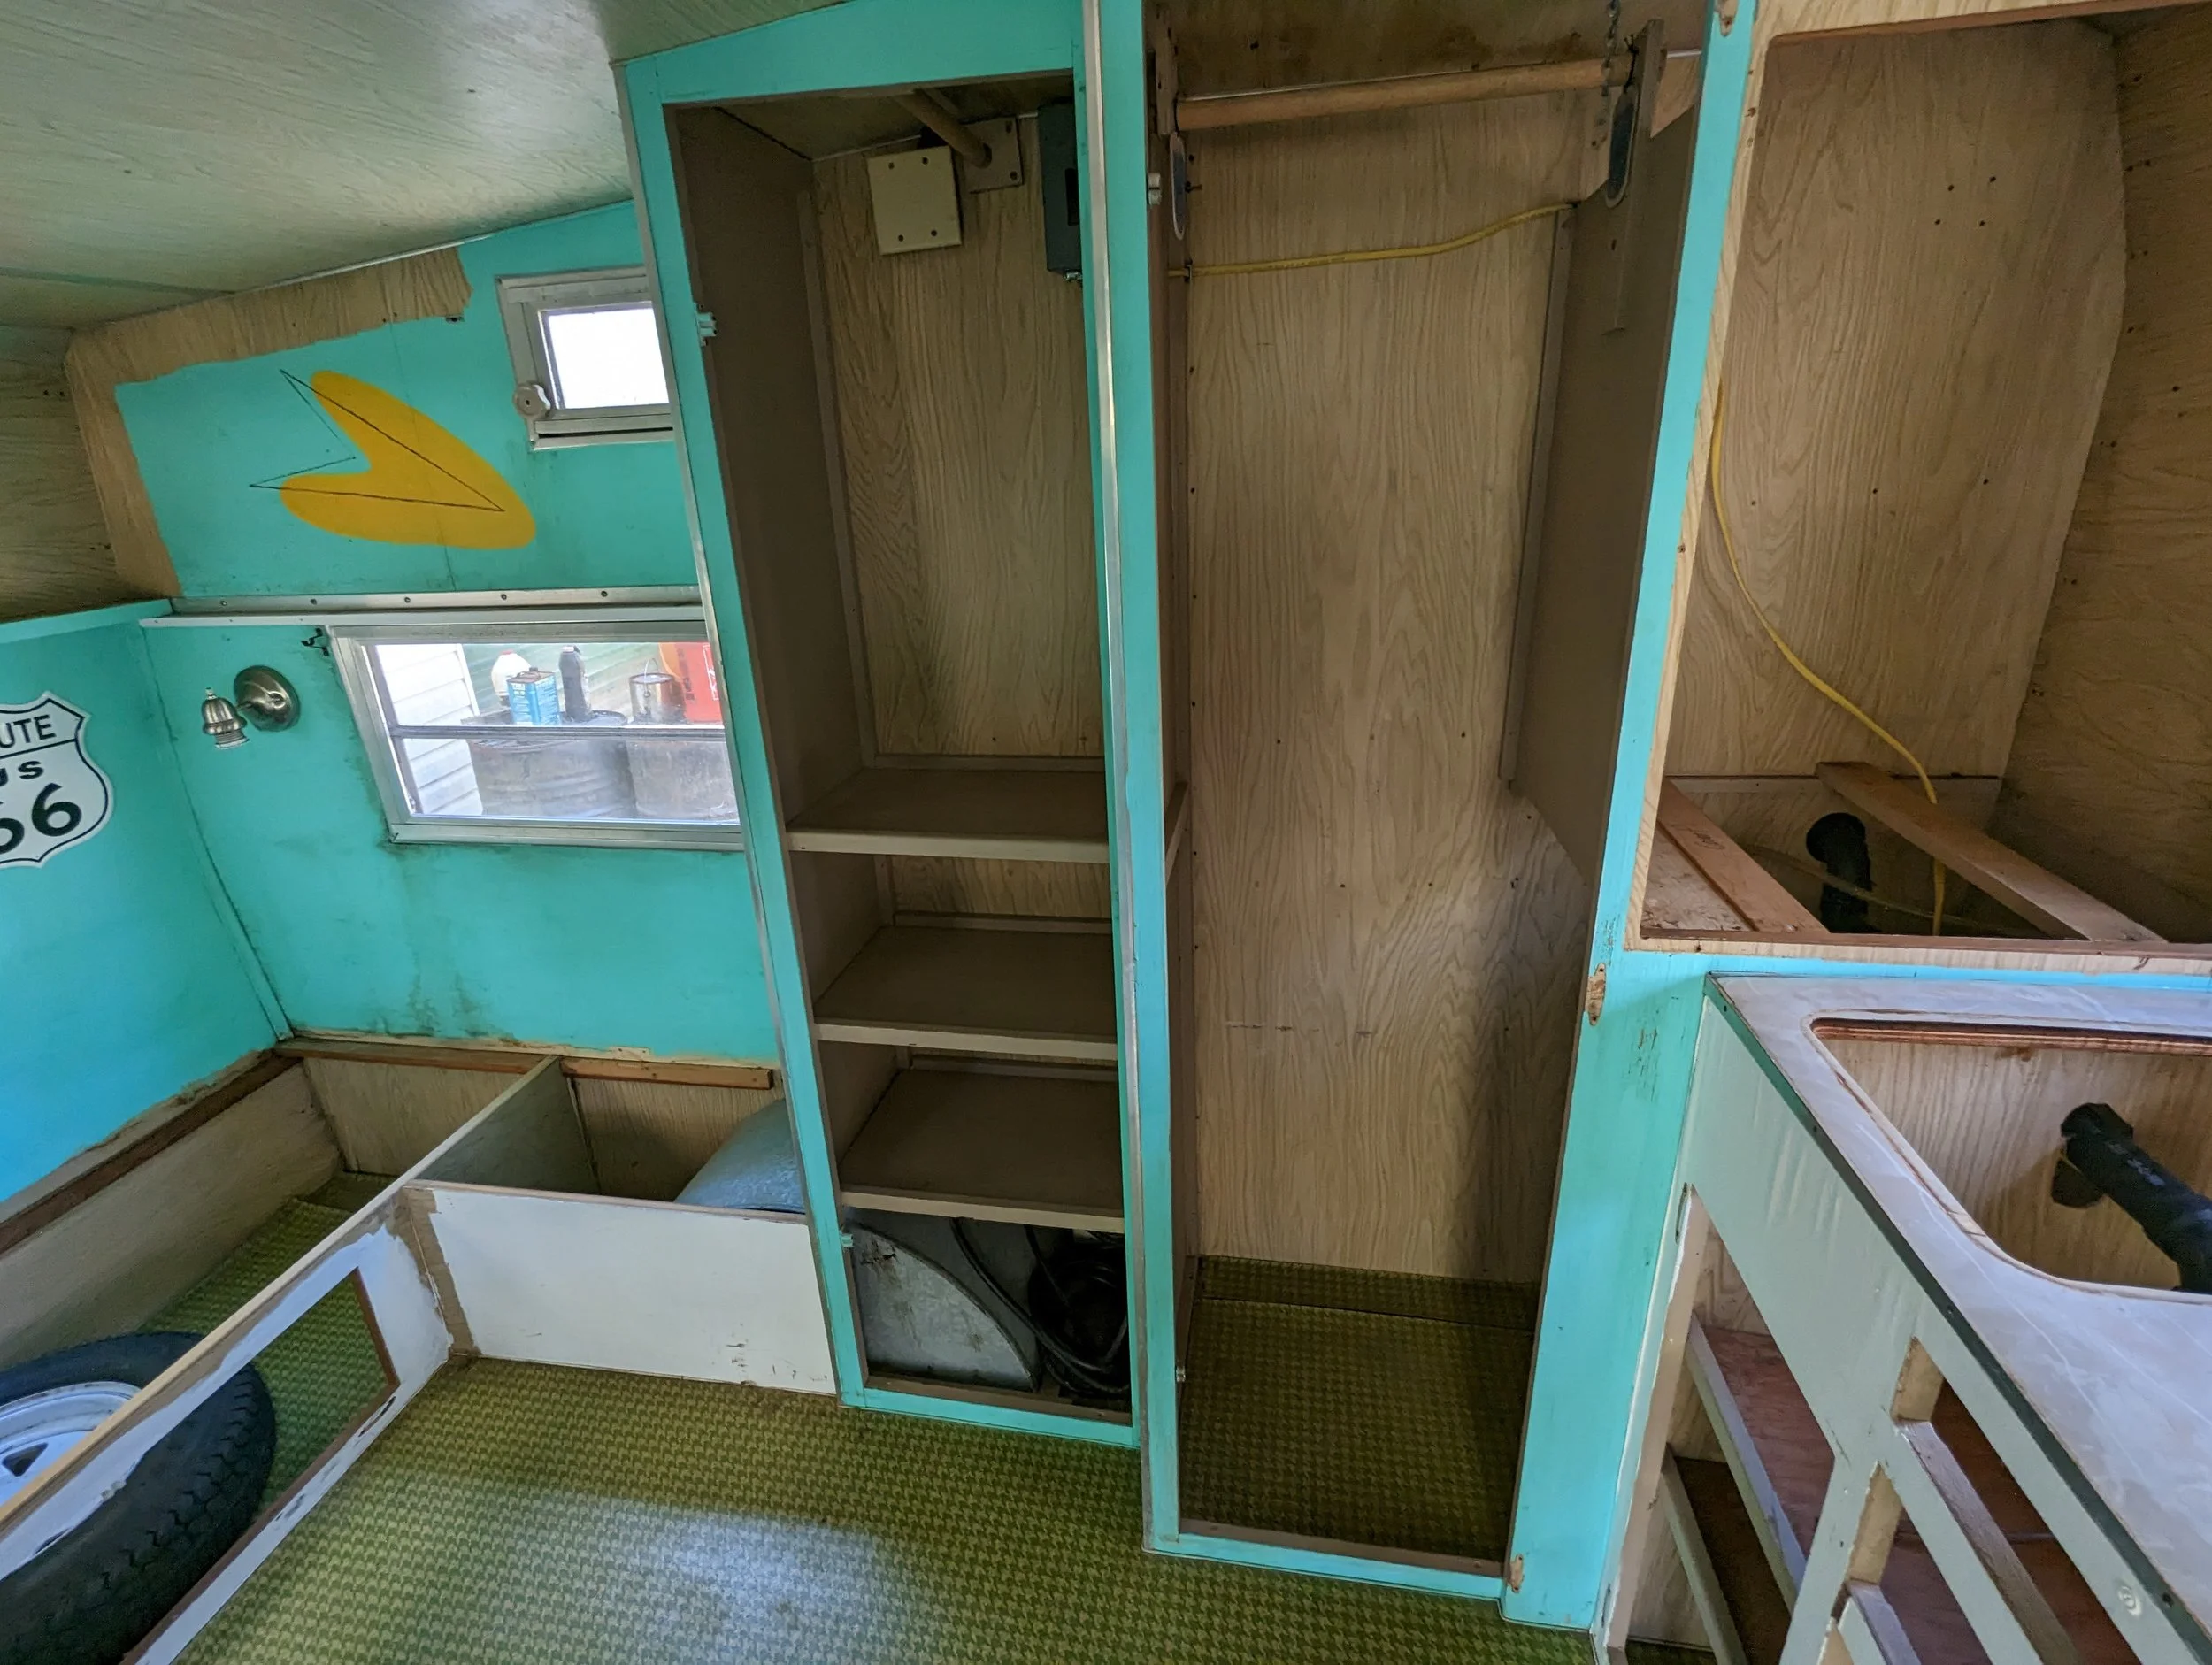
Progress
For those who want to see what is involved in the full restoration process of a vintage trailer, click the link below to view the in progress pictures from this project.
After
The gallery below shows the finished product after our restoration.